One day back in 1994 I woke to a warm sunny day… Off I went to work on My Laverda Jota… I got to the top of the road where I worked, and instead of turning down, I rode past and went for a ride… I found myself going to Slater Brothers, the Laverda importers at Collington. When I got there I parked next to a red 900 Monster… It was the first time I had seen one in the flesh… I was looking around it when Richard Slater came out with the keys and said take it for a spin! He said he was just off for lunch, so don’t come back for an hour! It was an enjoyable hour riding around the lanes of Herefordshire! I was really impressed, much lighter and agile than the Jota… I have always wanted one since then!
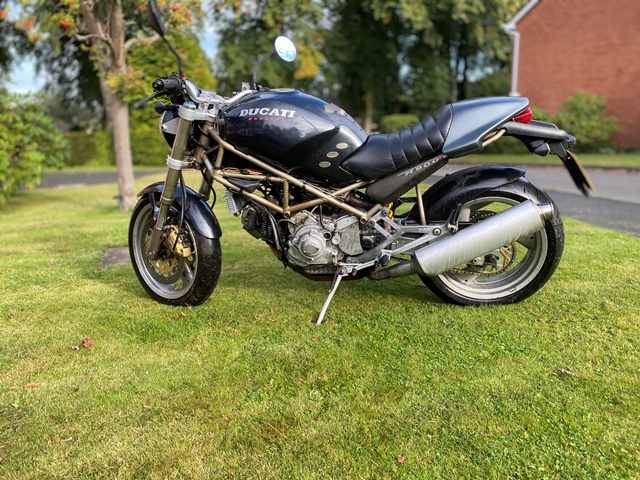
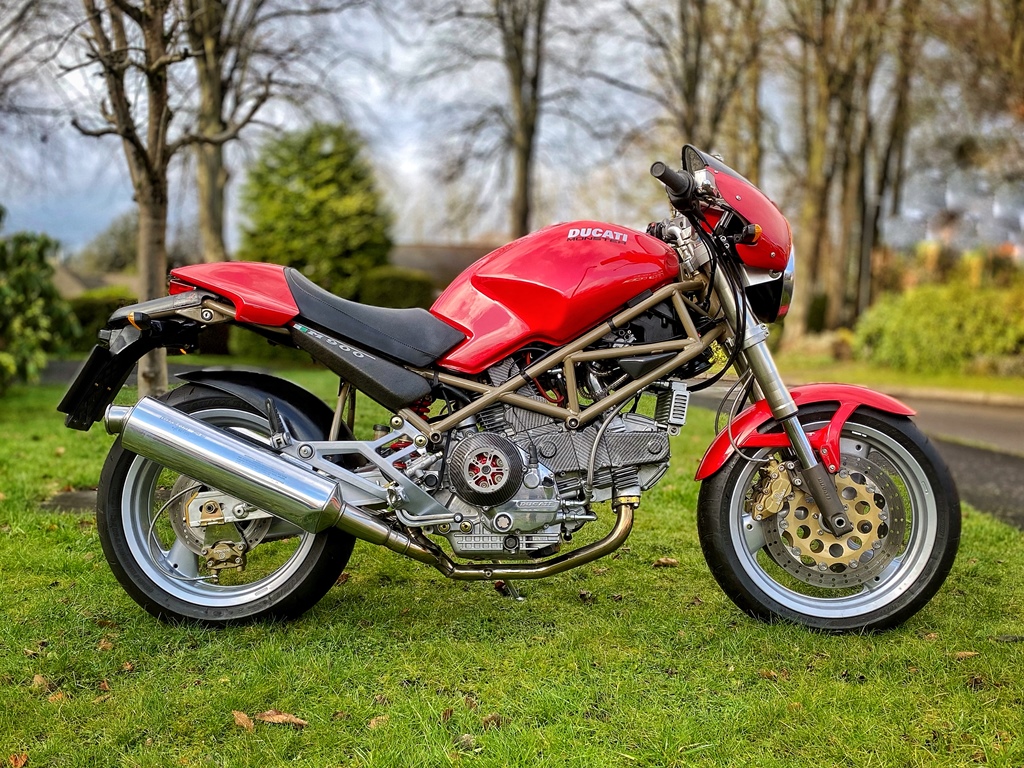
So, September 2020… Still in the middle of a build of a multistrada special when a bike i have always wanted came up… an early Ducati Monster. With the prospect of limited going out and no holidays due to Corvid, I decided to buy it! here it is… its going to the back of the garage for a while…


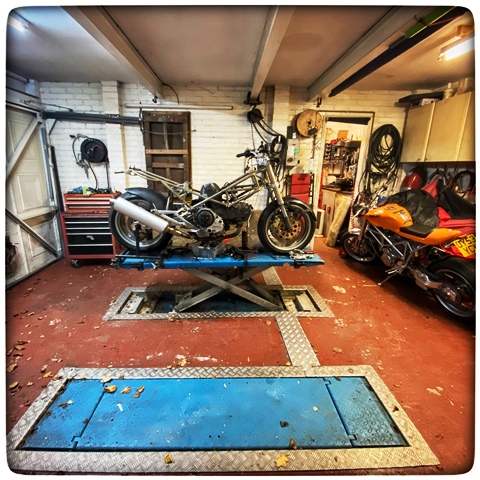
November 2020, lockdown again so no holidays… not going out… may as well start my winter project! As this is a restoration rather than a custom I will be pulling it apart in a different way… lots of photos taken, and boxes for bolts to be replaced, and parts to be plated, and lists of things to buy. this is the first restoration for many years!


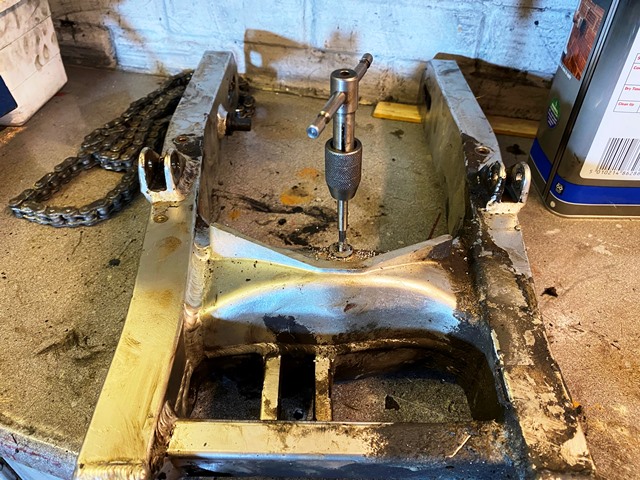
The stripdown continues… so far just one slight hitch… a broken bolt in the swinging arm… soon drilled and tapped out though

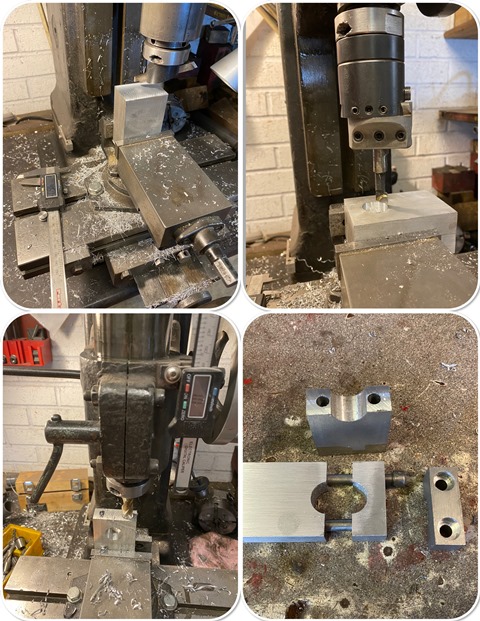
Tried to remove the cush rubbers today as I am going to have the wheels powder coated… the rubbers were good, so I didn’t want to destroy them. You can’t knock them out as the drift just bounces off the rubber, and there is no way to get to the outer sleeve… So I made this puller, that has a split threaded cotter. its a bit fiddly, but they came out a treat, and I can re use them now
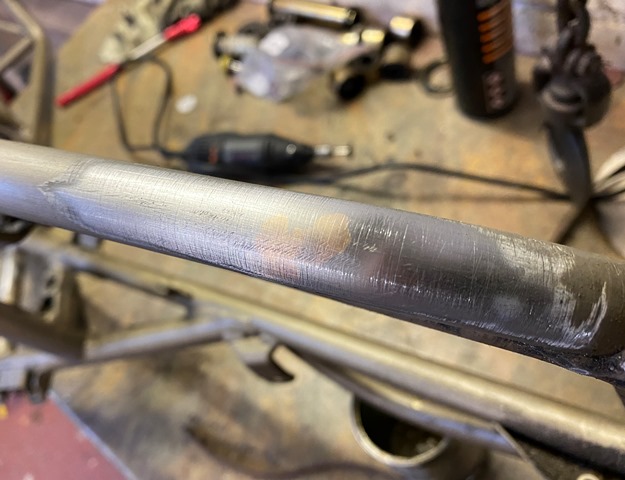
Just preparing the frame and parts to take to the powder coaters On the grab handle on the there were two small dents, makes you wonder how that happened? I just know that if I left them they would bug me forever, so I TIG brazed them up and filed them down. there is something really satisfying about TIG brazing!
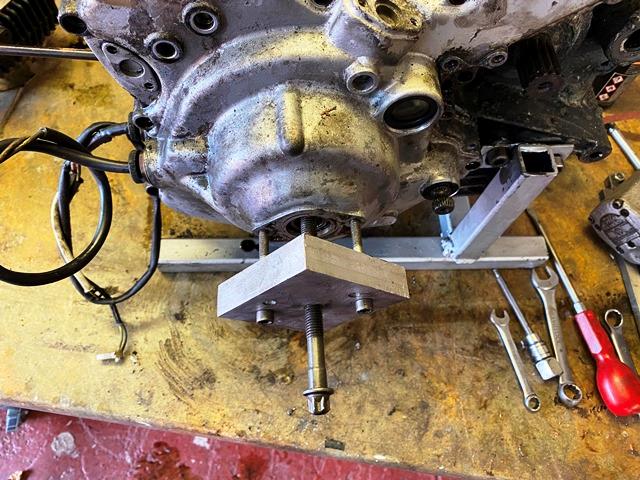
Looks like the engine has never been worked on, apart from someone has removed the alternator cover and put it back on sith what could best be described as glue! normally they come off with a tap, but in this case I had to resort to a puller…
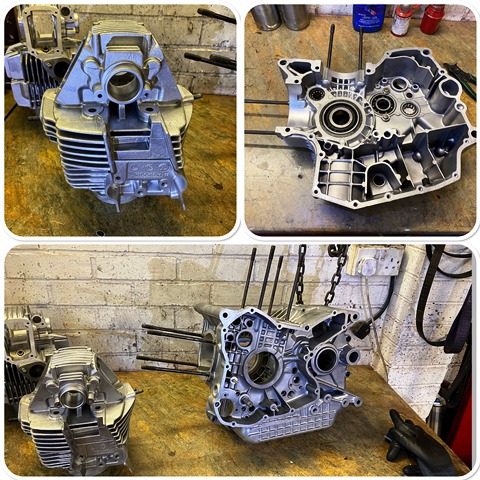
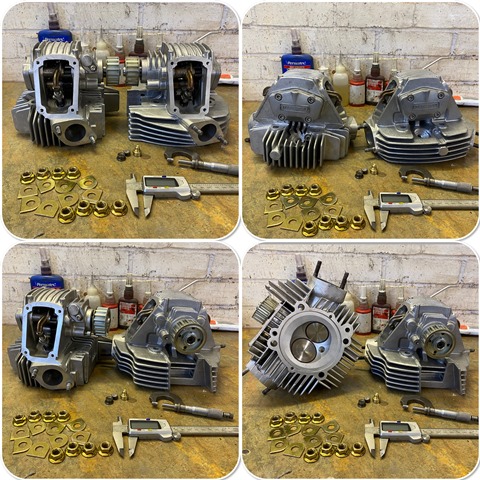
the engine is all apart, and I am pleased with its condition… no bore wear, and everything look good. the main reason to take it apart is to bead blast the cases… which of course means a complete strip. I am glad I did it anyway as people have pointed out the crank plugs come loose which damages the cases. While this one was not loose, it was not tight either can came out with a gentle twist of the screw driver… disaster waiting to happen! its locktited in place now…

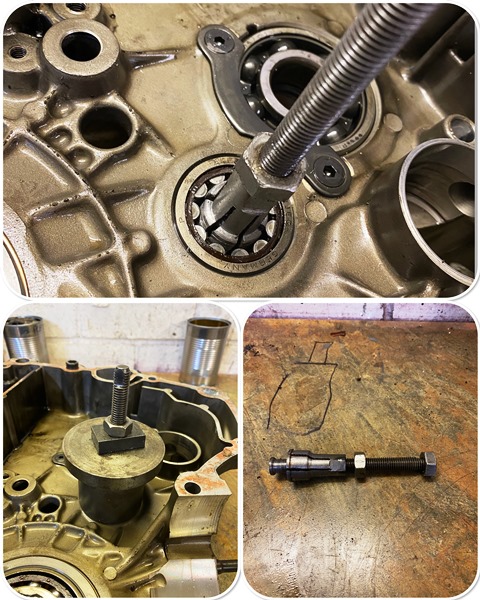
I hate bashing bearings out,and where possible try to make a puller of some sort… in the case of the swinging arm bearings it’s easy, just a stepped bush (it does destroy the inner seal..) and out they come. the step needs to clear the circlip though… some of the engine bearings are more difficult as you can’t get to the back… for this I made an expandable stepped puller, that expands into the bearing as a bolt rides up an internal taper. with this they come out easy…

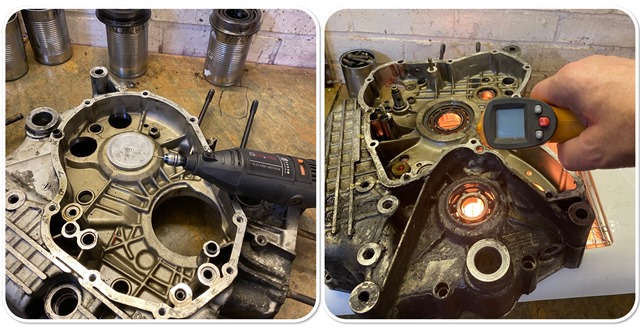
To get the bearings out I also heat the cases… I would like to use the oven as its a more even heat… but I can’t for two reasons.. the first is the cases are too big… and secondly she gets upset, particularly as its a new oven! So over the halogen heater it is… keeping an eye on the temperature… I also like to mark EVERYTHING, so it can go back where it came from, and in the same position. I am not keen on centre pops, instead I use a little diamond burr in the dremel… this will even mark bearings and means you can number stuff as well, and it does not cause stress raisers…
Of course parting the cases means the primary gear has to come off… and they are VERY tight… you can forget anything but a really robust puller. here is one I mad a few years ago. with this it came off easily.
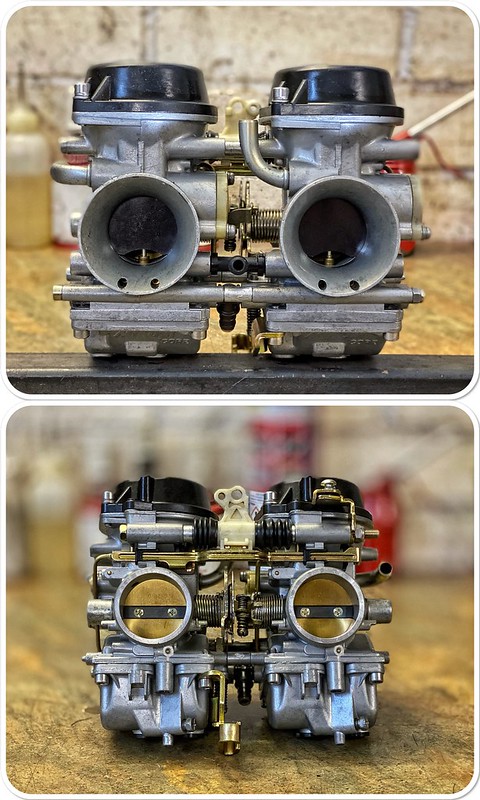
here are the carbs, they are in remarkably good condition! I had some genuine new floats and needles so I used those in the build. I did bead blast the outsides, taking care to use silicone bungs in all the holes… they came out a treat!

while the engine and frame are away I have turned my attention to overhauling the front forks… they were not leaking but I thought I would treat them to some new seals and dust covers…. looks like someone has recently changed just one side.

the engine cases are back from the vapour blasters… what a superb job! attention to detail is what its all about and they came back prefect… I will definitly use this guy again… the finish is as good as I have ever seen… https://spvapourblasting.co.uk/ I know these cases are painted from original but the paint always flakes off, so I have decided to leave them bear, and use ACF 50 on them to keep them looking nice… this will probably be a low miles, fair weather bike for me…
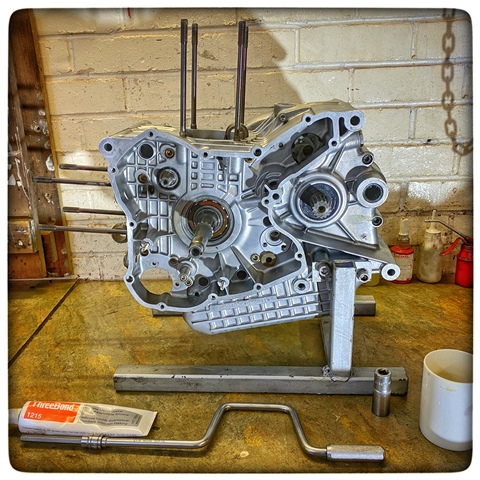
the engine build begins… I got the cases nice and hot and pressed the bearings in, and then checked the crank and gearbox shafts end float as I wont be using a gasket as Ducati have now discontinued them and use Threebond in place … I had already ordered a few shims by measuring the old gasket (14 thou) and taking that off the shims that are in there… when the shims come in a few days I will build it properly…

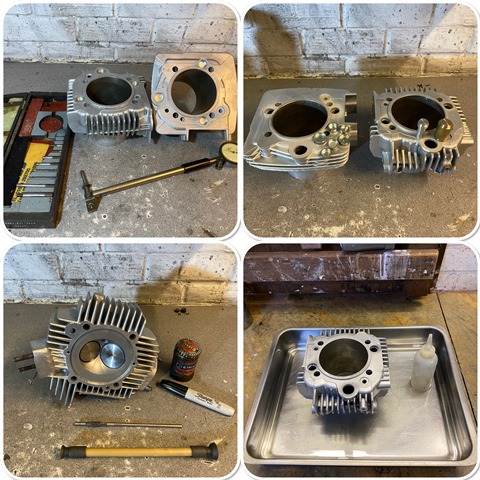
todays job has been cleaning out the oilways in the barrels after being vapour blasted… To do this properly and get every last bead of media out I removed and replaced the core plugs… they are cheap to buy. There was a surprising amount of crud behind them… Made a couple of stepped punches so I could drift them in nice and square.
Checked the bores for wear, there simply isn’t any! Ground the valves in with some fine paste (how old is that tin of grinding paste 😅) and checked I had a continuous seal with a sharpie pen. Gave the guides a quick clean with the burnishing hone which just removes carbon, Finally, a good wash in petrol the tray and a check in the bottom for any blasting media. My mate who builds automatic gearboxes gave me the tip on the stainless steel trays… you really can see any debris in the bottom!
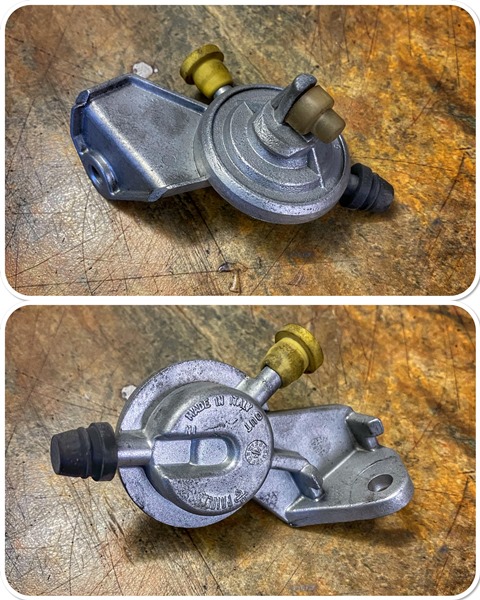
Waiting for the engine spares at the moment, so filled some time doing some bead blasting on bits and pieces… one of the best bits of kit I have is a blast cabinet… It used to live outside at the back of the garage because I could never seal it from escaping media as obviously the air tries to inflate the cabinet… with machines about abrasive dust is a no no… Then I hit on the idea of a centrifugal type filter, which offers no resistance to the air going through it. I made the filter out of an Ikea plastic box and some sink drain pipe, it vents outside…. the principle is as the air is made to twist and turn, the partials of dust and media centrifuge out and drop to the bottom of the chambers… so the first chamber gets the most, the second less and so on. there is hardly anything on the drive and nothing in the workshop. its difficult to get this level of restoration to a part without it… Bead also gives that nice sheen to alloy parts and they don’t pick up dirty finger prints. its very good at resisting oxidation as well, particularly with a coat of ACF-50… here is the fuel tap.
I used to make a BIG mistake with bead blasting… I could never get a really nice finish except with brand new media… I moaned at the supplier once and he asked me what pressure I blasted at… high as I can I told him.. there is your problem then! you are shattering the glass beads and turning them into sharp dust, hence you get a dull surface! So I went home, filled my cabinet with new bead and got my wife to turn up the pressure as I cleaned a part… soon as it went shiny, that was the best pressure!
50 years ago I was an apprentice to the best mechanic I have ever known…Gerry Lampit. He is 89 now and I still visit him… he is still sharp as a razor … He taught me that the hammer was the last resort… that’s always stayed with me. So when I needed to change the swinging arm bearings his words rang in my head

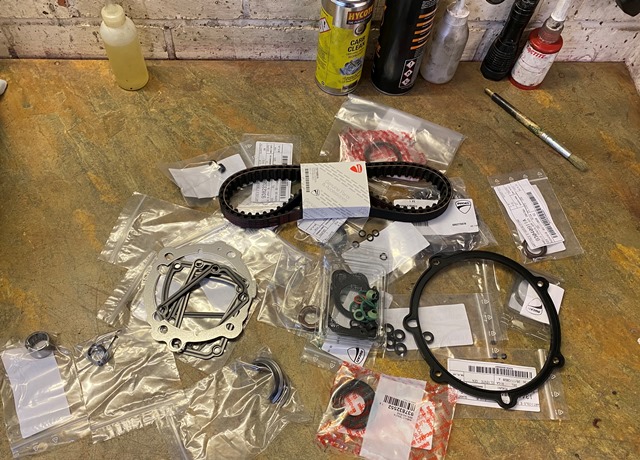
Parts have arrived from Moto Rapido. What a pleasure it is to deal with Craig and Luke, they are SO helpful and knowledgeable! after years of suffering the ignorant local dealer, these guys are the best!
The engine rebuild has started… the cases are together, crank and gearbox shafts shimmed, and I spent a couple of hours making a flywheel holding tool. it worked rather well. Don’t ask me why the hell I welded the bar right across it, had to cut it to get the socket on! senior moment!

the rebuild of the heads is going well… some of the clearances are out though, not surprising as I gave the valves a bit of a grind in and replaced the half rings. I have a little spreadsheet that I put the values in, which calculates everything from there, and also mirrors the measurements in MM rather than the thous I prefer to work in. Old school I know!
Been doing the plating on and off, its time consuming, but I put parts in the bucket, set the timer so I don’t forget, and the magic happens… just a few parts to go…
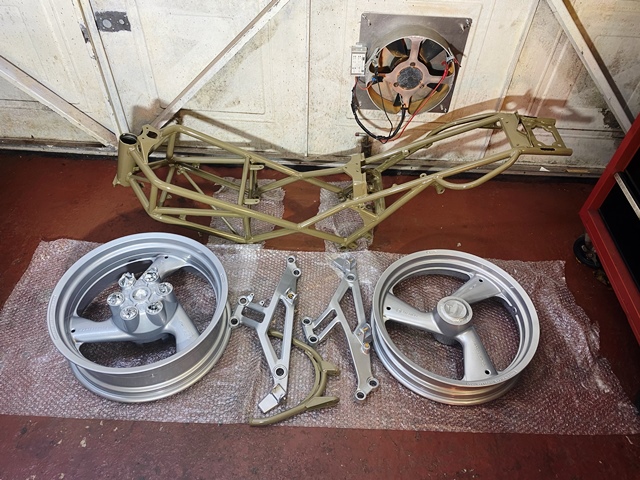
frame and wheels are back from the powder coater, and its another superb job….


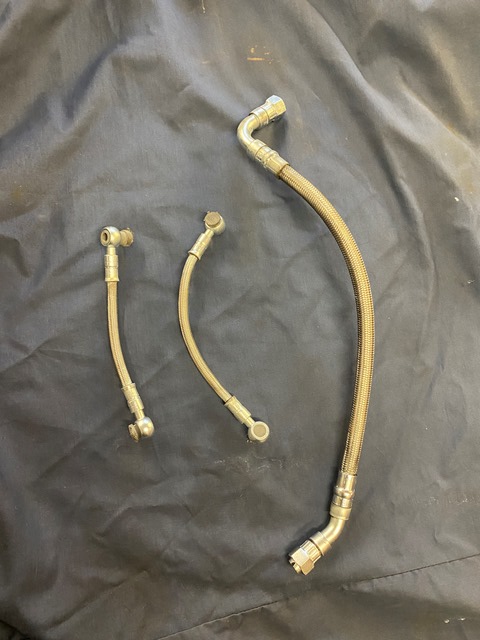
one of the things that has been niggling me is the engine oil pipes and oil cooler lines are badly corroded on the ends… replacements, even aftermarket are a fortune… So I decided to try and plate them… they actually came out rather well!

Some bolts I just tighten… but critical components I always use a torque wrench… in the past I have used a long series a spanner and calculated the pull I need on a spring balance… but for some reason I could not get the spanner on I have used in the past and its part of an expensive set, so I didn’t want to modify it by grinding… , so had to make a tool… I knew that old spanner and socket would come in one day!
One tip I picked up years ago when I used to build Crossflow race engines was always mark the head nuts/bolts after the first stage torque. I would paint an arrow on them with tippex… then move on to the second stage torque, and then the final stage. then I would check all the arrows were facing the same direction, and if any weren’t, I would give them an extra tweak until they did. the rational for this is that it takes much of the varying nut/bolt/washer friction out of the equation and you get an even clamping force.
Of course that’s exactly what you do in effect on modern engines, but now in a more refined way with an angle gauge… on a BMW engine I recently worked on the bolts were torqued to 40 NM, then 90 degrees, then another 90… I still put arrows on them! the reason for that is its all to easy to get confused as they need to be puled down in sequence, and there are 20 bolts! its all too easy to forget where you are and its not like a torque wrench where you give it a click to check! All too easy to give a bolt 90, 90 and another 90, at which point it pings!

When people ask me why Ducati bikes are expensive to maintain… I say try doing the valve clearances and adjusting them to the correct specification… its a fiddly job on the bench, let alone in the frame!
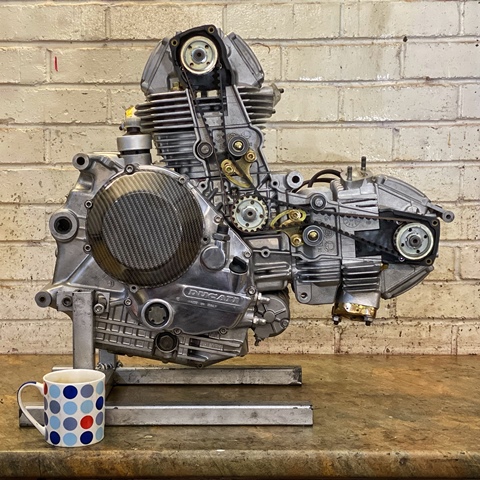
more or less finished the engine build, and also added some of the plated parts to the carbs, they have come up really well..
did a bit of painting and polishing today… painted the clutch cover, and rear spring, and put a coat of lacquer on the cam belt covers which I decided to carbon effect dip… not everyone’s cup of tea I know, but I like the look… The silencers came up really well! there were a few marks on them that would have niggled me so I decided to polish them.

Started the rebuild… first job was to put the frame on the engine, easy job, I held it my wife popped the bolts in! I then fitted the headstock bearings, which I have replaced as there were small sighs of pitting, and they are cheap. I pulled them in rather than use a hammer, which also means you can give them a good tighten and bed them in nice and hard against the register. Its starting to come together… Was also playing around with the image of the engine…


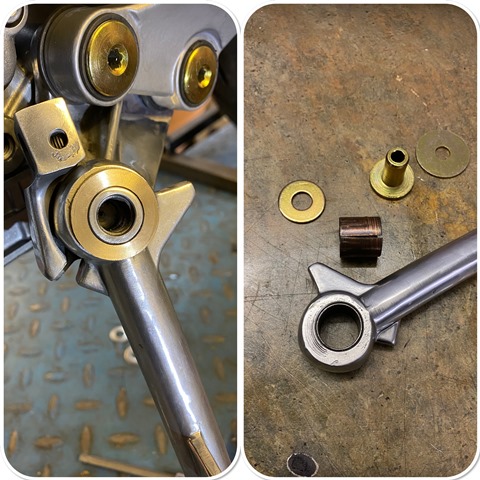
my wife will often say I am definitely on the spectrum… today I fitted the side stand and noticed there was more play than I liked… so I made a new bush, and bronze thrust washer as I knew it would niggle me if I didn’t!
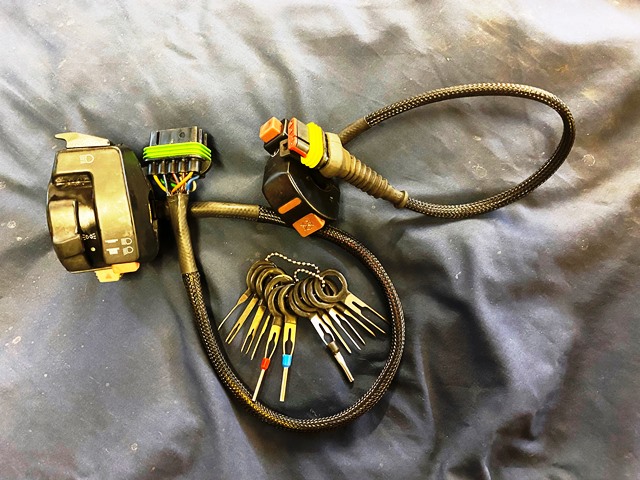
Its funny how to me progress seems slow, but when you come to put it all together you realise that all the little jobs you have been doing over the months are now paying off as it becomes an assembly job! One thing I have done in the last few days is to check the loom over… its in great condition apart from one area… It looks like someone has fitted an alarm at some point…, and someone has subsequently removed it! they didn’t do a bad repair, but I hate the tape over bare wires, and I wanted to check the integrity of the joints, so I pulled the soldered wires apart and re-soldered them, and covered the join with shrink wrap. To finish it off nicely I took the terminals out of the blocks with my terminal removal tool. this is a fantastic little set of tools, and very cheap to buy.. I have lost count of the times I have used them over the years! that meant I could use some braided expandable sheathing which most cars seem to use these days. it means it can go over the terminals and then fit tight on the wires. this is finished off with some hear shrink, and if you use the glue lined stuff it makes a good repair.


next the hydraulics … I stripped everything down and cleaned the callipers and master cylinder up. the callipers came up well, but the anodizing on the master cylinders were poor… so I bead blasted them and have decided to leave them silver… All the seals were perfect, so I have reused these. I cleaned the callipers up in petrol with some very fine scotchbrite, being very gentle, they came up a treat.

looked at the switchgear and although its in great condition, the plastic sleeving was tatty… so I used some of the braided stuff, and some glue lined shrink wrap to finish it off…
starting to go back together, I am pleased with the way the exhaust and silencers polished up… Polishing always hurts my wrists these days… must be getting old 😟

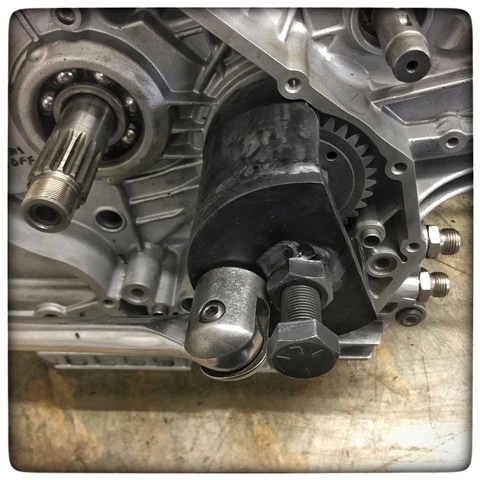
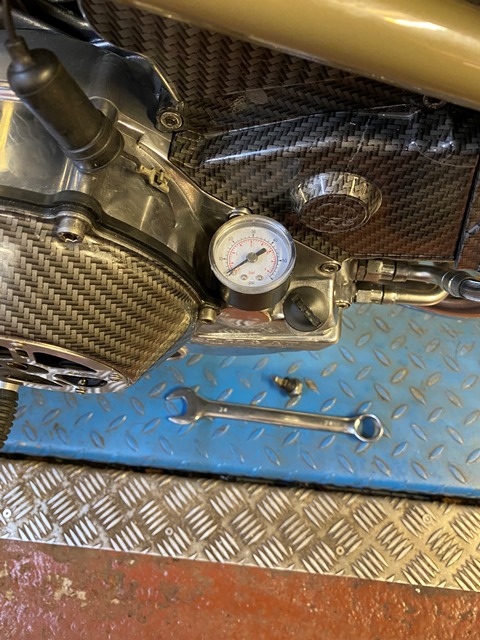
Time to start up soon… I am always aware that a rebuilt engine needs oil at first start-up, and while I always fill the filter before I screw it on, the oil cooler and pipes are empty, as are the oil ways, and the oil pump. I have therefore always used this method of giving the engine the best start in life I can and inject some oil into the system via the oil pressure switch port. I used to do it on many of the race engines I have built in the past and it was always satisfying to take the oil filler cap off and see oil seeping out the rocker shafts or cam bearings. Either way I always turn it over until the oil warning light goes out… which unless you prime the oilways can be a worrying amount of time!


well it started first time! I screwed in my oil pressure gauge and it went up straight away… sounded nice! I like to start builds on a dummy tank if I can…. I made that dummy tank over 40 years ago, its started a few engines! its got an original laverda tap on it!
Started preparing the tanks and bodywork for painting… I know the tank hinge on the monster is a weak point, and it did show evidence of being strained… so I decided to take the bracket off and strengthen the area and TIG weld the bracket back on… I normally have tanks blasted but the guy who does it for me is off with Covid at the moment, so it may be a while before he is back, and I don’t trust anyone else after having some shocking jobs done in the past….

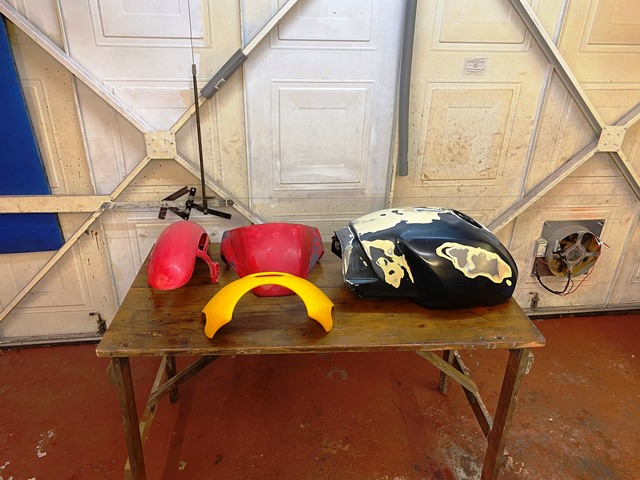
things didn’t go well with the painting… the seat cowl had rattle can paint on by the look of it and it reacted badly so I will have to do it again… the other parts came out well though… two coats of clear on the mudguard and fairing, one coat on the tank before I put the decals on and then hit it with one and a half coats…

One of the few fabrication jobs I have done on this bike… I have decided to fit an ignitech ignition… Most people seem to fit them next to a smaller battery, or move the coils over, but I wanted to keep the unit away from the heat of the engine… So I made a bracket to fit it under the LH side panel. it just fits nicely…

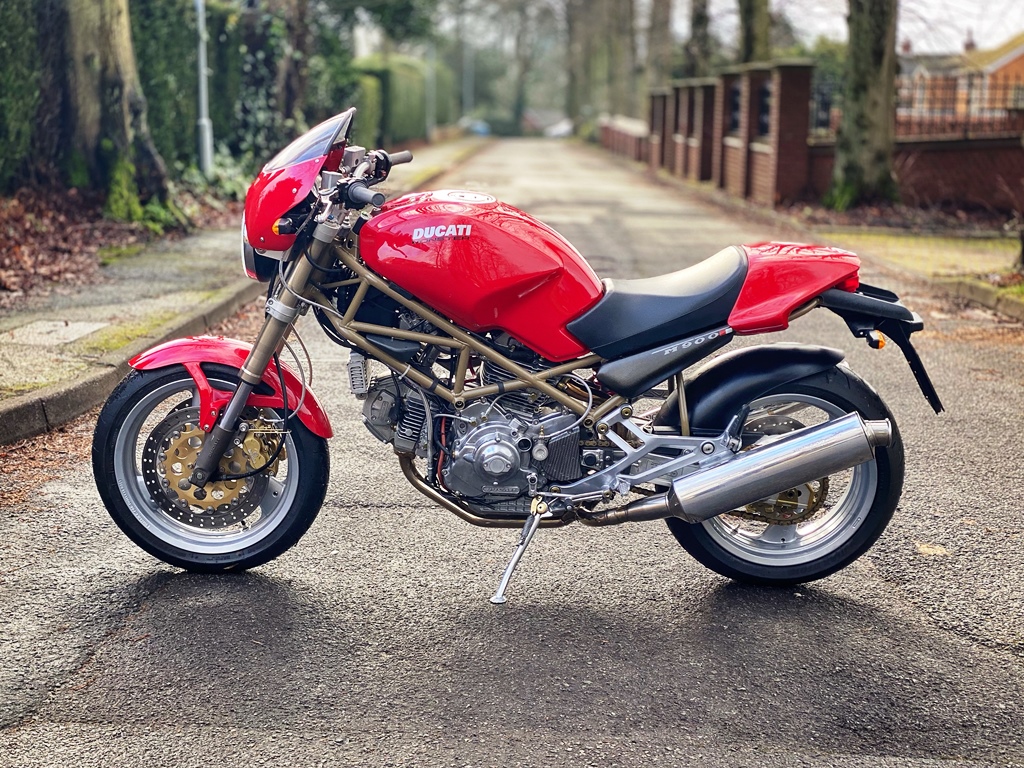
well apart from a few snagging jobs, and replacing the rear brake hose which is too long… its finished. I need to tweak the ignitech unit and enable one of the output channels to limit the revs to 3000 when the stand is down… When I was 19 a good mate rode away from the pub with the stand down… just up the road he came off, and the accident resulted in him losing an arm… those things stay with you…

Need to find another project now!
They say a build is never finished… in some ways true! I am still finding little jobs to do like making some frame bungs as none came with the bike…

I was looking at the picture of the bike the other day and thought” those silencers are too long”… and its very quiet… Well I had the original silencers which were quite marked, So I looked at shortening them and removing part of the baffle… not a bad job… by removing the bracket I was able to slide the sleeve down enough to remove the end with a cutting disc. I then cut 100mm off, and welded it all back up again. One thing I learned many years ago when welding exhausts is to clean the carbon off the inside… or it leaches through the weld and the joint cracks! They polish up really well…you just have to remove the original finish with a DA with some 120 grit, followed by some 400, then polish…


roll on Spring… But I have decided one must go…. and it ended up being the 996 engine bike!


Belly pan fitted … ready for summer!

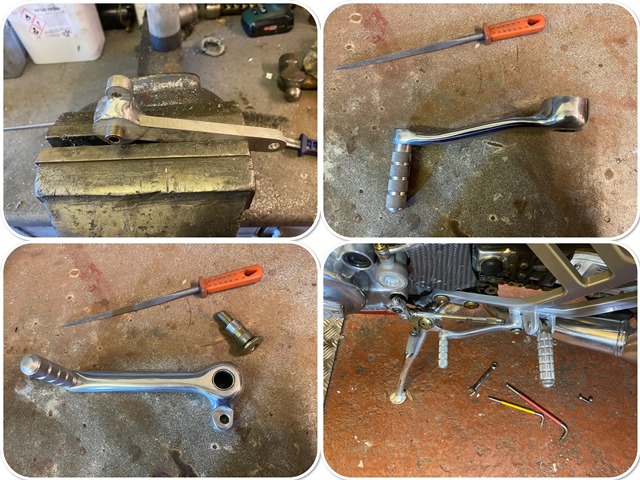
I have been putting a few miles on the bike now, and bedding it in… one of the things I have found difficult is the gear change. the distance between the footrest and the lever is a little too short for me. I checked on line but I couldn’t see any longer alternatives, so I decided to make one. I cut the profile out of some 10mm plate with a jigsaw, and TIG welded the parts together… then I filled it to shape, it took a while but it was strangely satisfying! finally I drilled the holes, and found an Olite bush the right size for the pivot. much better now!

I made a couple if risers yesterday as I wanted the handlebars a bit higher…I could probably bought them for a few pounds but where is the fun in that 😊 made on my old milling machine which dates from the early 30’s… no CNC here although i have now gone digital 😂