
A question I get asked a lot is how do you make the custom tanks and seats in fiberglass? well I thought I would do a tutorial from some of the photographs I have collected over the years of making them.
First thing to do is to get some builders insulation foam. thicker the better, but any will do as you can glue it together. I find the cheaper brands better as the foil is much easier to peel off! this is important as you will see later.
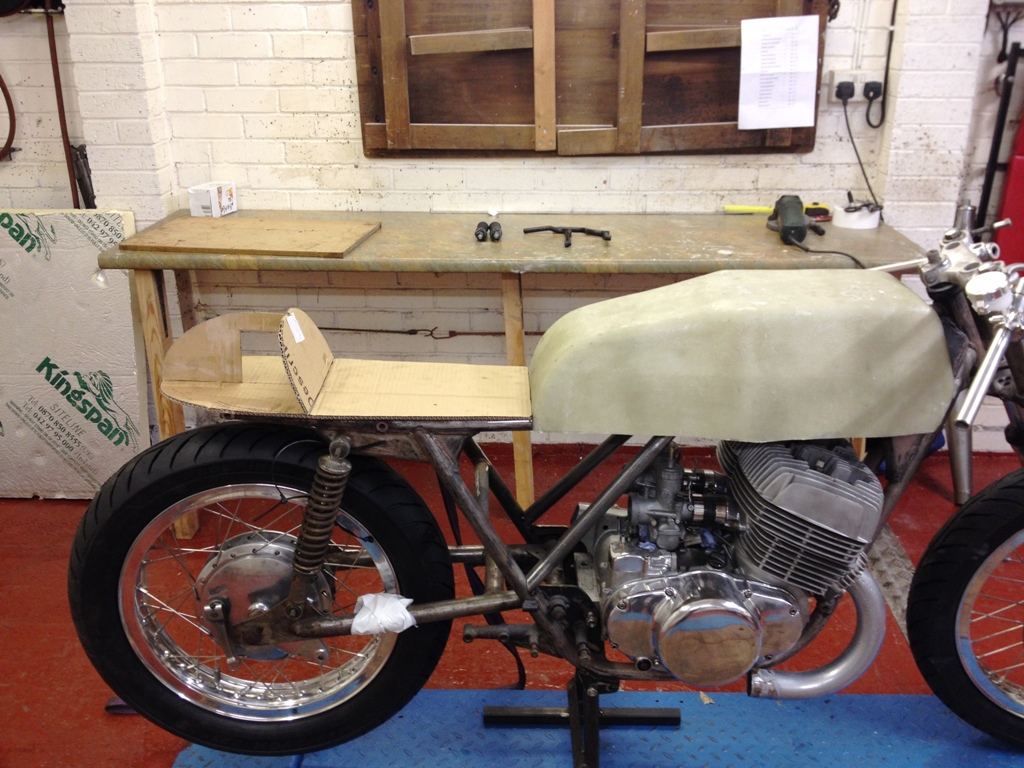
First thing is to decide on the shape of the seat… I often make a cardboard pattern to get the shape and proportion right.
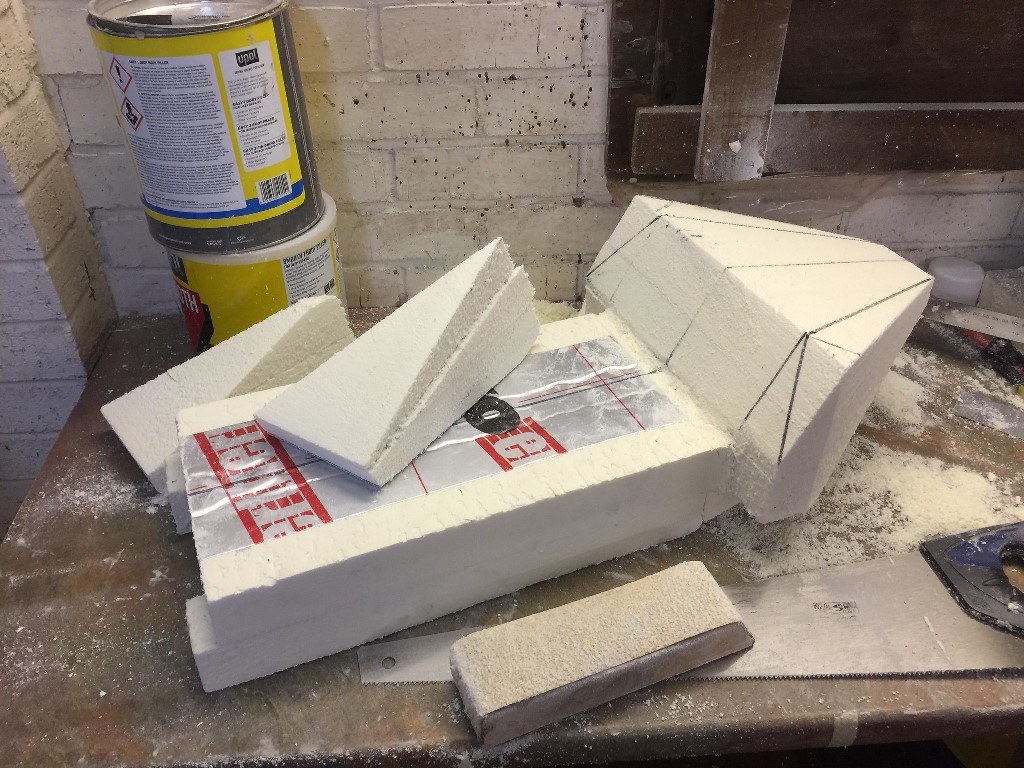
Once you have the foam, cut it into square shapes with a hand saw, it cuts very easily! Then peel the foil off and glue them together with an aerosol spray contact adhesive. spray both faces and let it dry for 10 mins before pushing them together. removing the foil is really important as its causes serious issues when you come to sand! you can leave some on in areas where you definitely know you are not going to be shaping.
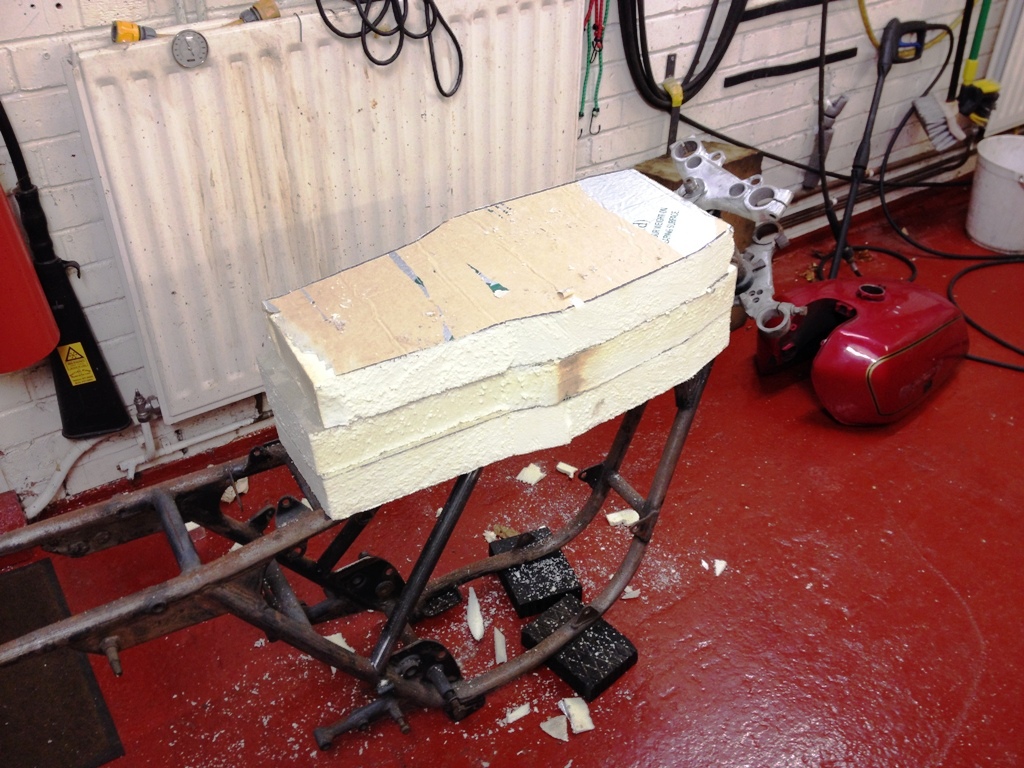
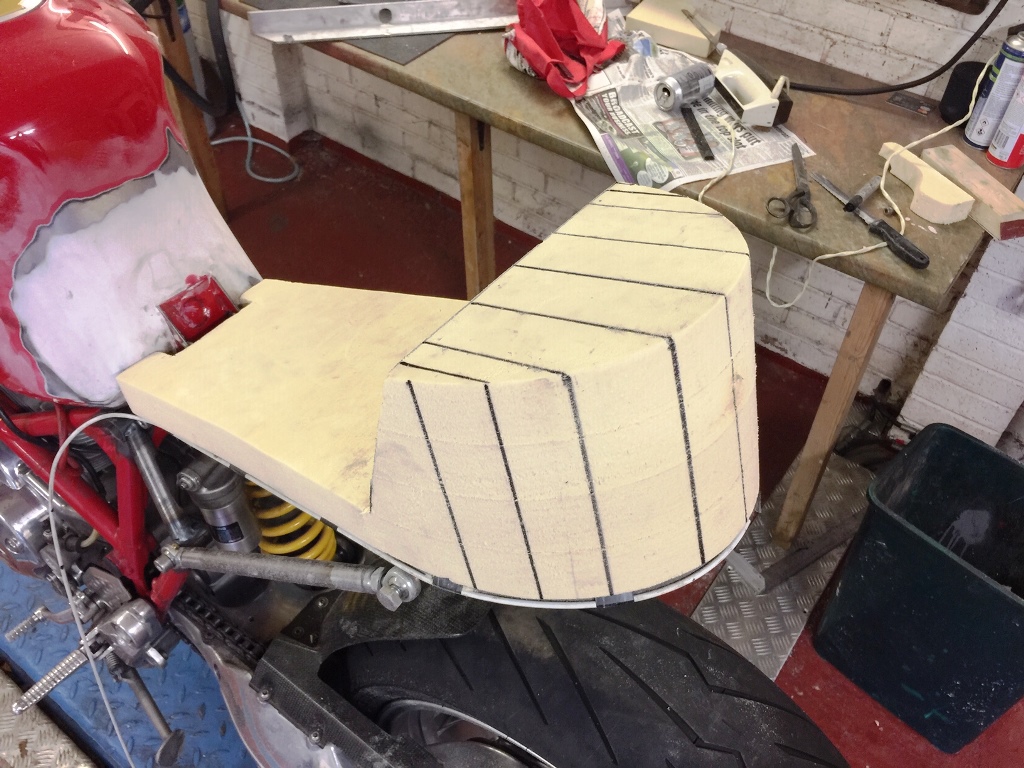
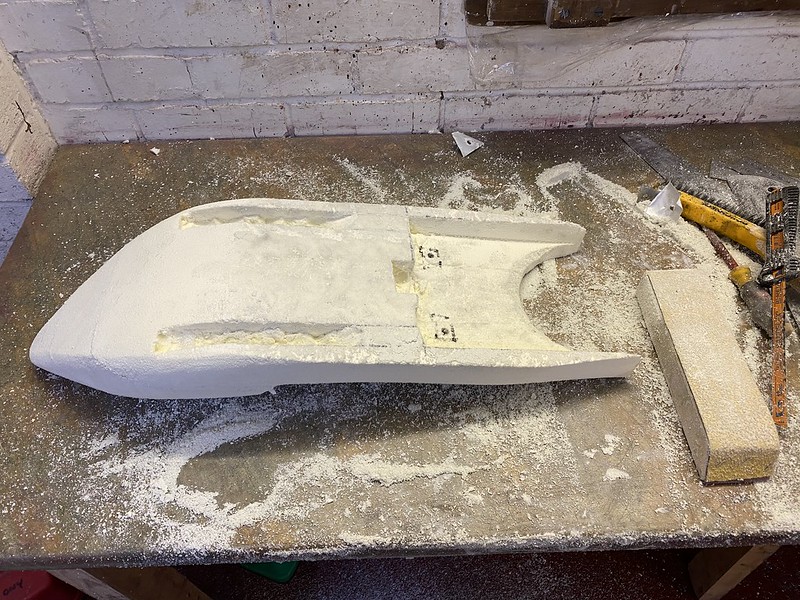
Next step is to cut the foam into the basic straight line shape with a hand saw. I find a smaller fine blade saw good for this… A good tip is to draw lines on the seat with a marker pen before you start cutting. this means you can keep both sides symmetrical. Get as much of the basic shape before you start to sand. The closer you can get it with straight lines, the easier it is to keep the shape when sanding!
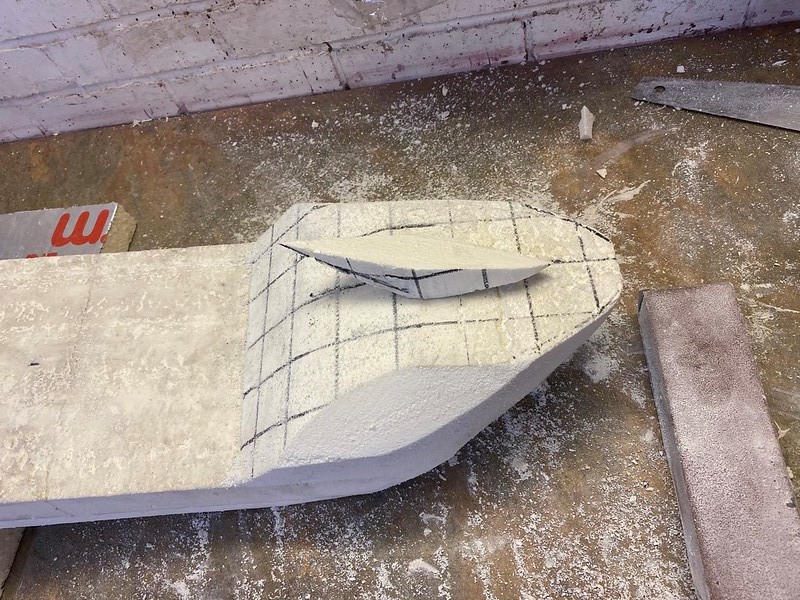
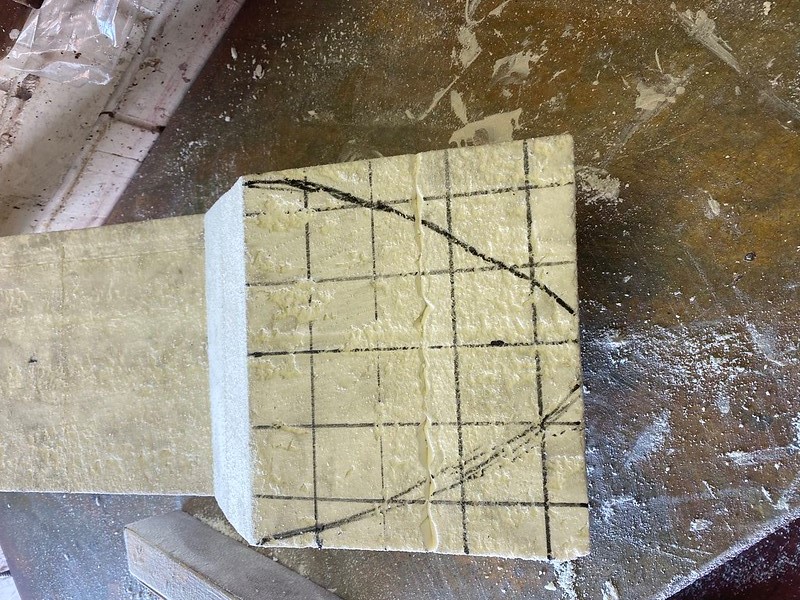
Next step is sanding! for this I use a block of wood with some 80 grit aluminium oxide paper stapled on. It sands VERY easily, and it’s easy to make a mistake at this stage so go easy, and do a bit of one side then the other. Wear a mask for this… If you do make a mistake (i did in the picture below) cut some foam out and glue a bit back in!
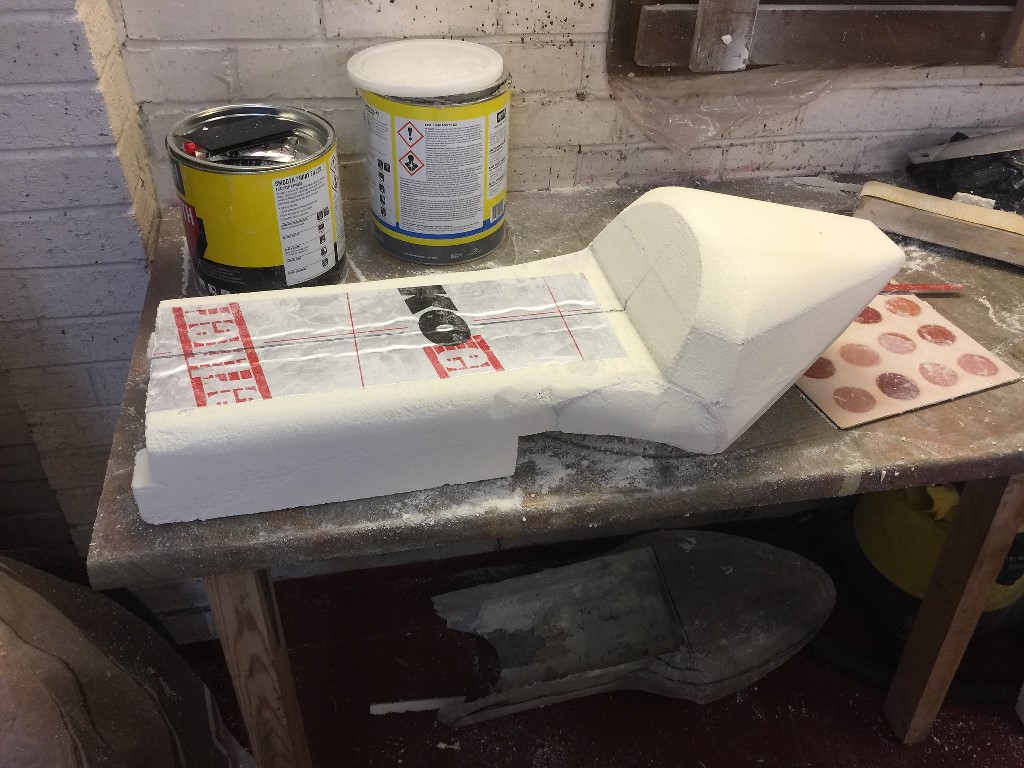
 At the foam sanding stage, try to get it as close as you can, foam is easier to sand than filler!
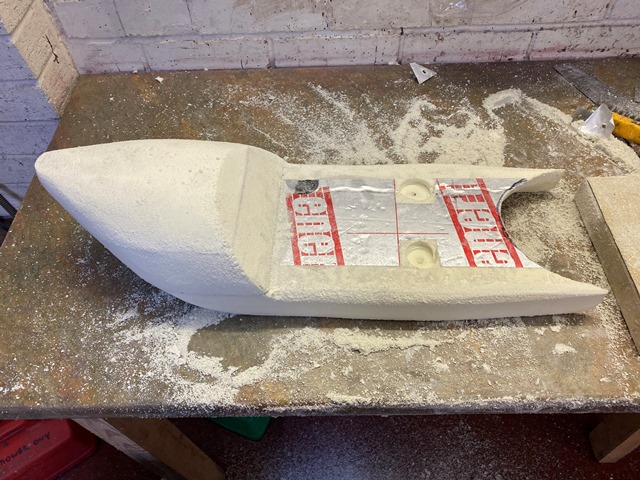
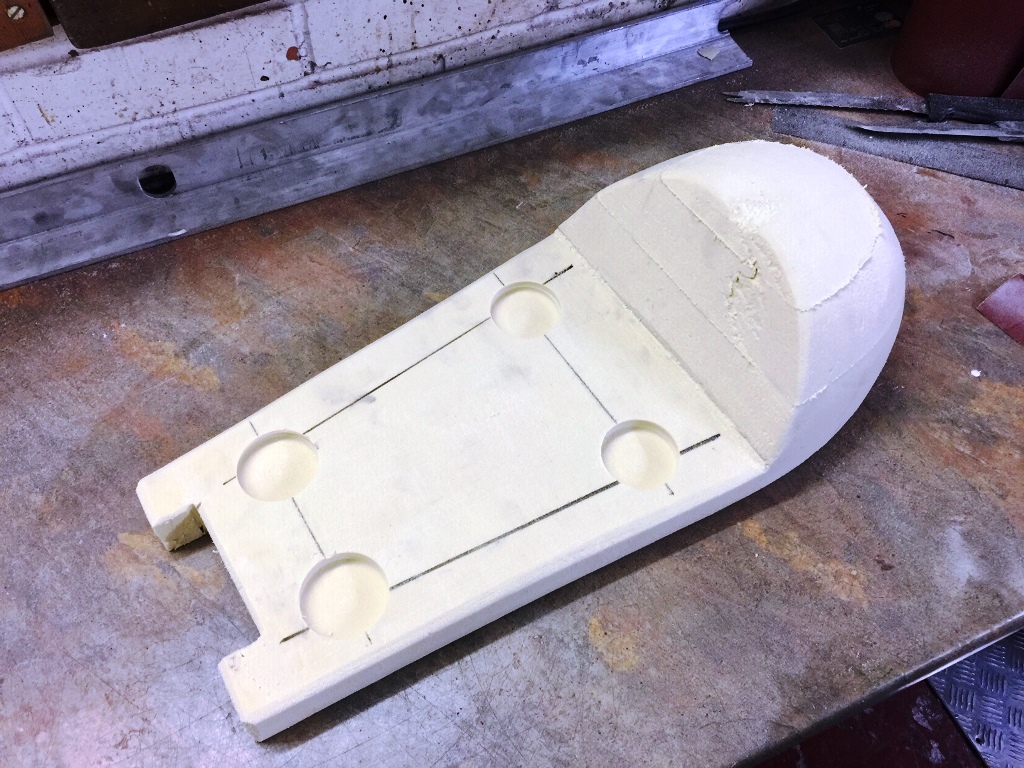
Try to think about how you will attach the seat, as you may need to recess some of the bolt heads. you can make reacesses in the foam easily with a cutting disc in a Dremel, or a burr in a drill.
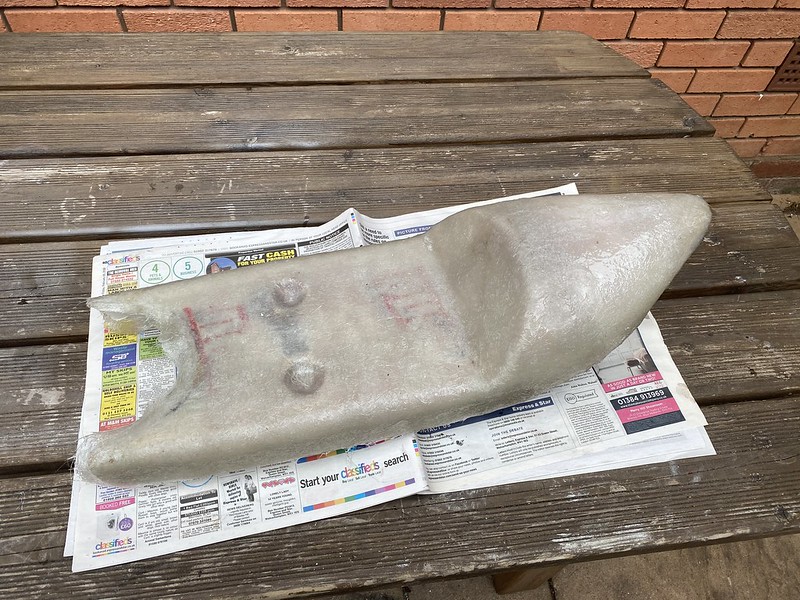
sometimes you need to cut the underside to see how it’s going to look on the bike… a hacksaw blade with some tape as a handle is ideal for this.
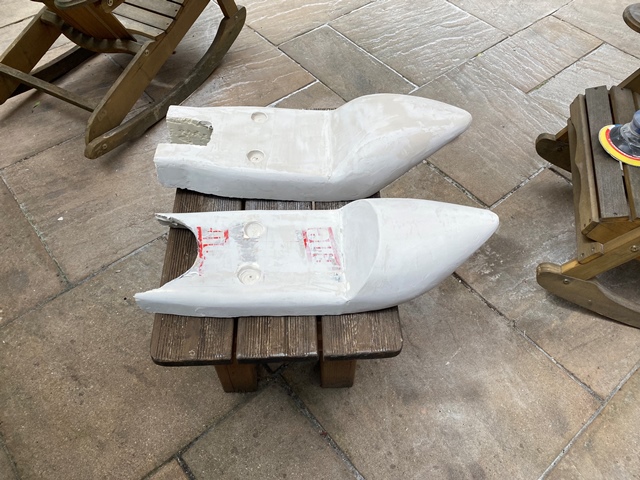
When you have your final shape, its out with the body filler, and give the whole top side a thin skim of filler. At this stage its OK to use some cheap body filler. don’t try to do it in one go, add a few thin layers and give it a sand between to take the top off any ridges. if you break through, no problem, just add more filler! no need to get a fantastic finish, shape is more important… I tend to go a bit over the top at this stage, and its wasted time!
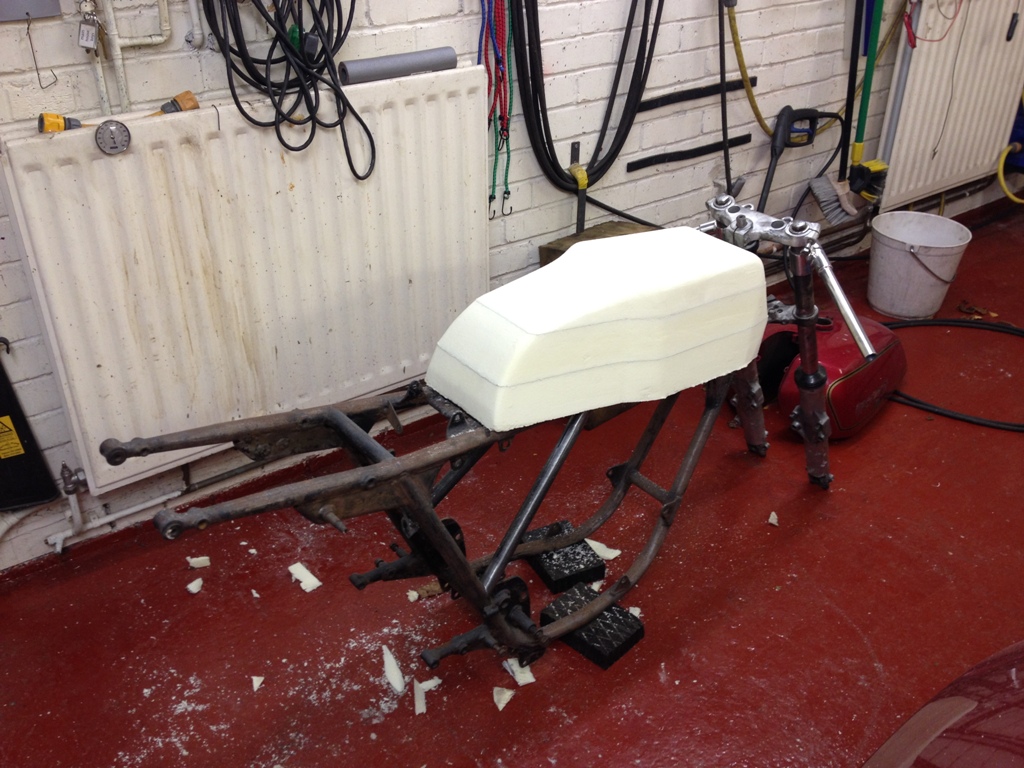
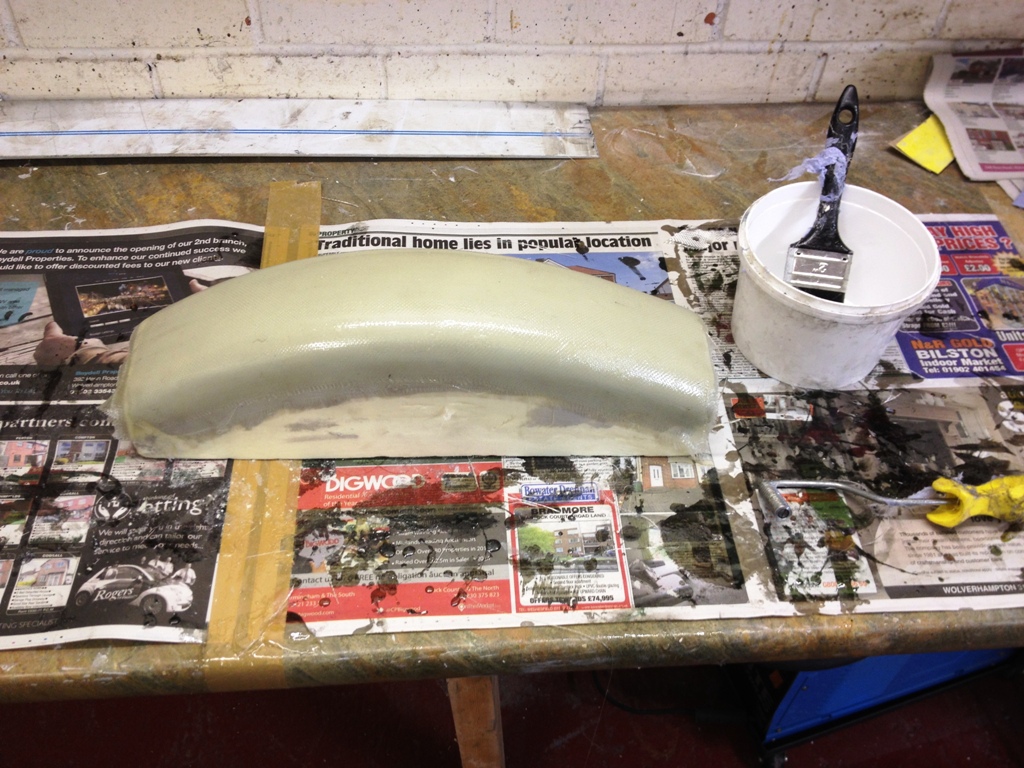
Next stage it to cover the whole thing in fiberglass! I use three layers of medium weight chopped strand matting. I used to finish off with a layer of woven cloth, but now I don’t bother… Buy your resin from a good supplier and not car factors… this stuff has a short shelf life and tends to sit on their shelves. I use Polyfiber in Birmingham You will need matting, resin, hardner, some 2″ brushes, and a syringe, all of which they supply. The syringe is so you can accurately measure the ratio of resin to hardener which is between 1 and 2%by volume, NOT WEIGHT! I normally mix 300ml of resin, and put in 4ml of hardener. this gives a reasonable working time and amount to do say one layer on a seat. Before you start, cut some matting to the rough shapes you are going to use. Then coat the mould with a layer of resin, put the matting on, and wet it out with more resin! it’s a messy job… use the end of the brush to stipple the fibers down. it gets easier as the resin soaks in. Look for any air bubbles and give them a dab with the end of the brush. wear gloves! Don’t clean the brushes, they are cheap at 50p and almost impossible to clean out! I normally do three layers, but might add a bit more in stress areas.
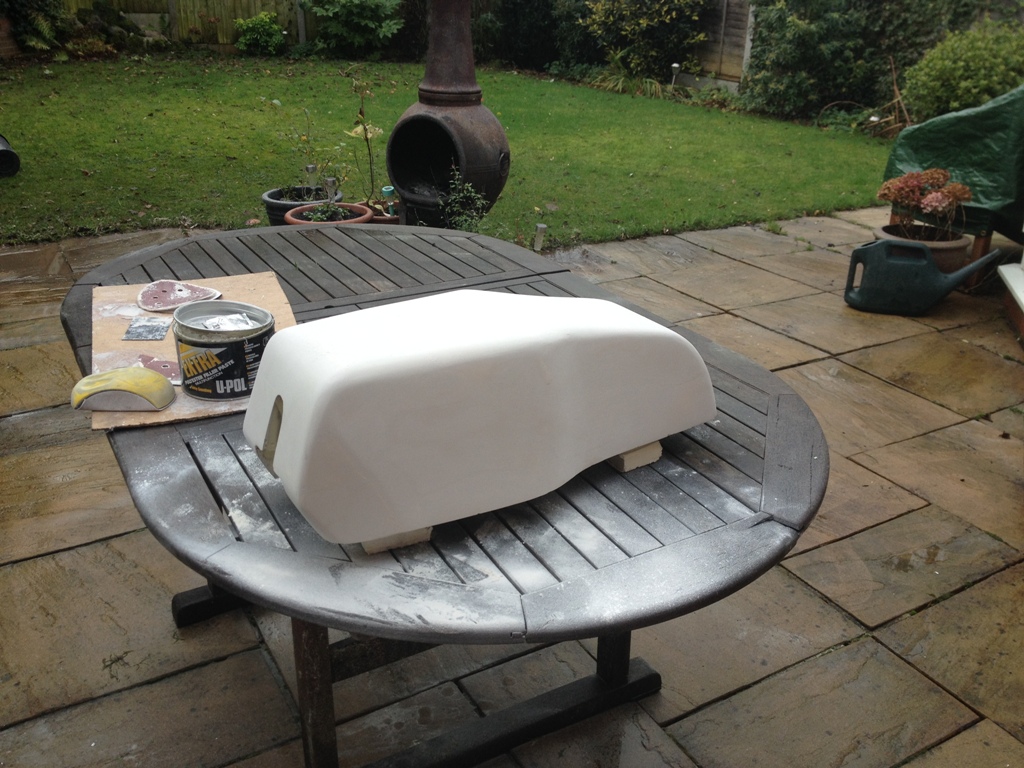
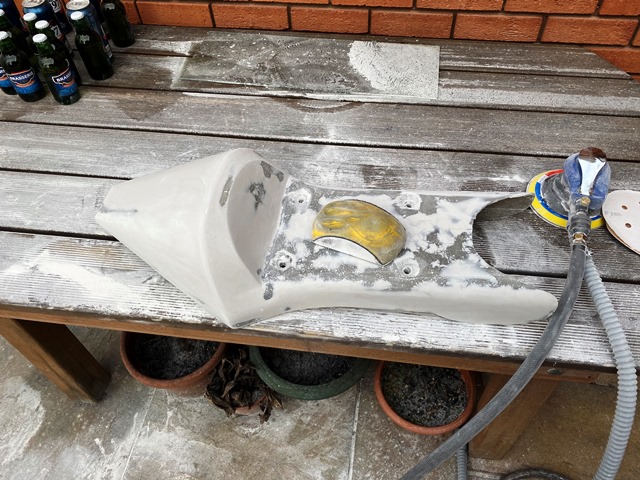
When its hard, cut out the foam! it breaks out quite easily, although on some seats it takes a bit of getting out in the tip! Next stage is a quick sand down to remove any high spots, then a coat of good quality body filler. UPOL is my favorite. it takes a while a this stage to get a good shape and finish… start with 80 grit, then 180, and finish the filler with 320.
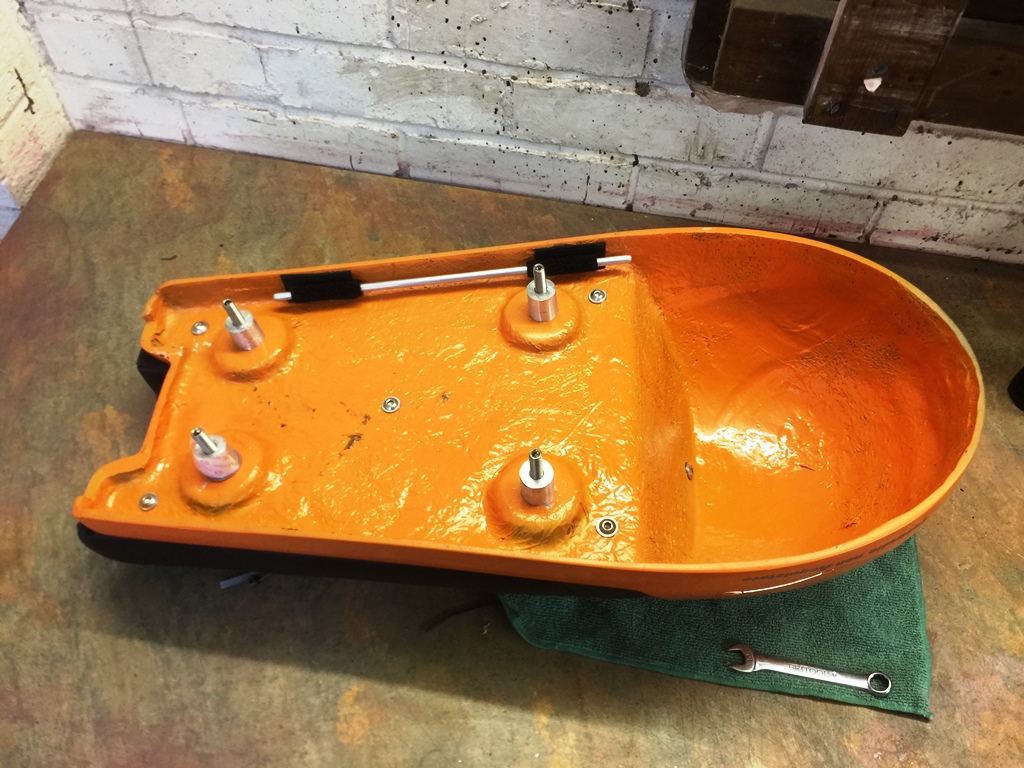
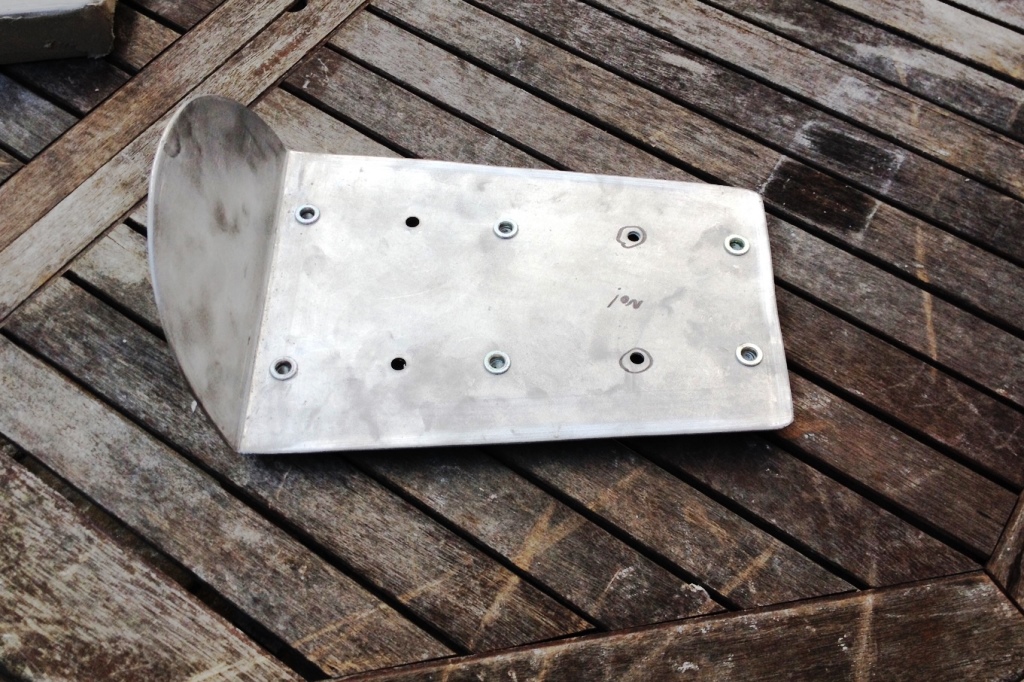
At this stage I usually make the seat base out of 2.5mm alloy sheet. This is held on with some rivinuts. you should use an expensive tool to pull these in, but if you use the aluminium rivnuts they can be collapsed with a nut, bolt and washer (put some oil on the threads to make it easier)
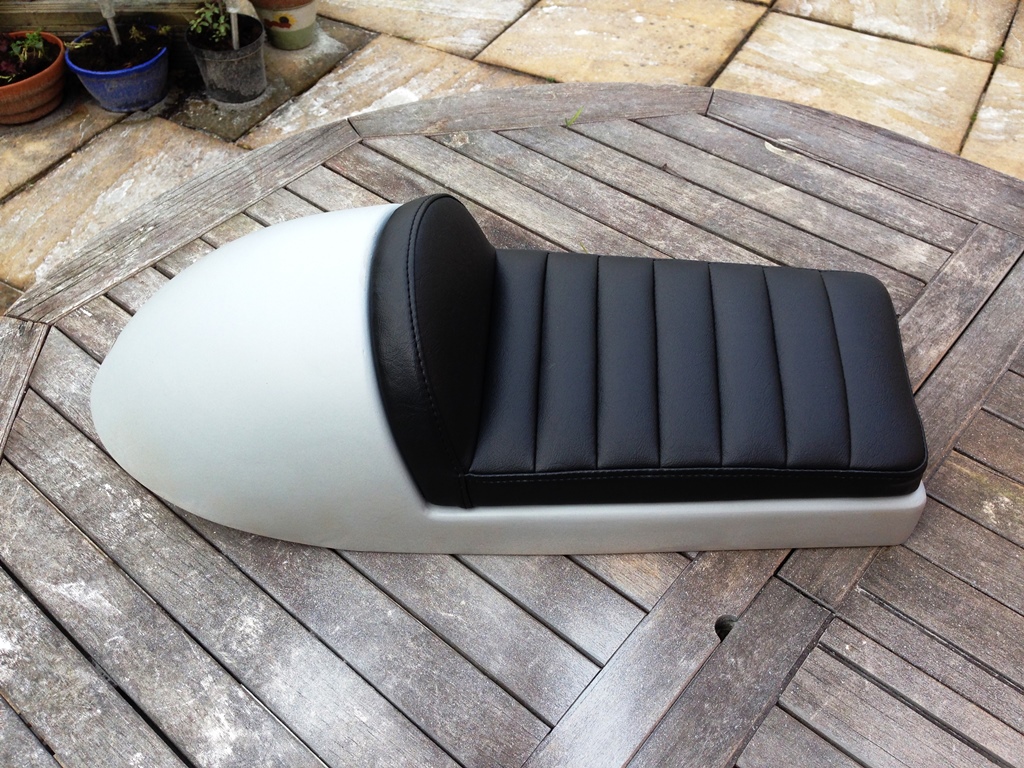
For the pad, I use some closed cell foam, EFP 30 which is firm, but has the advantage that it can be sanded to shape. you can always add some softer foam on top. the softer foams are very difficult to shape and experience tells me this is the best option! the upholstery is one of the only jobs i put out… I use Aldridge Trimming in Wolverhampton and always ask for Karen… she is an artist! some of her work below…

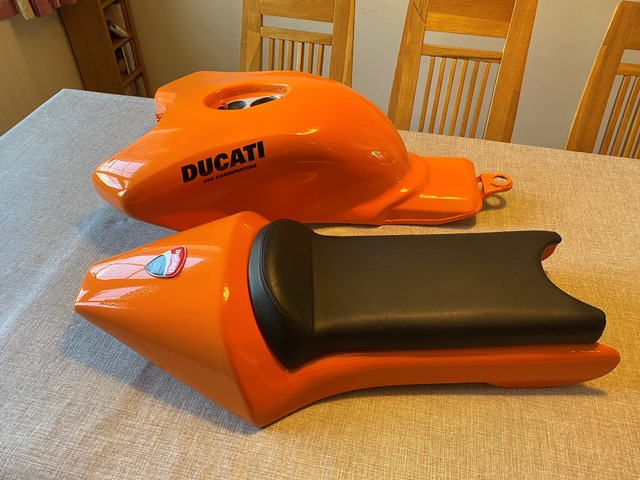
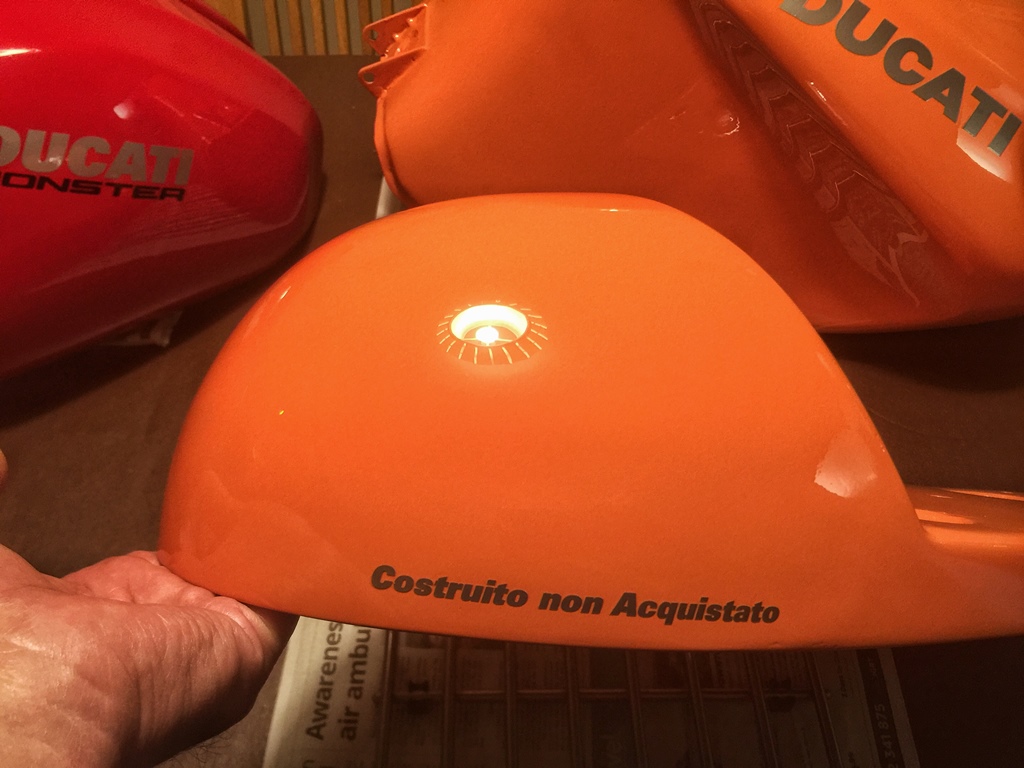
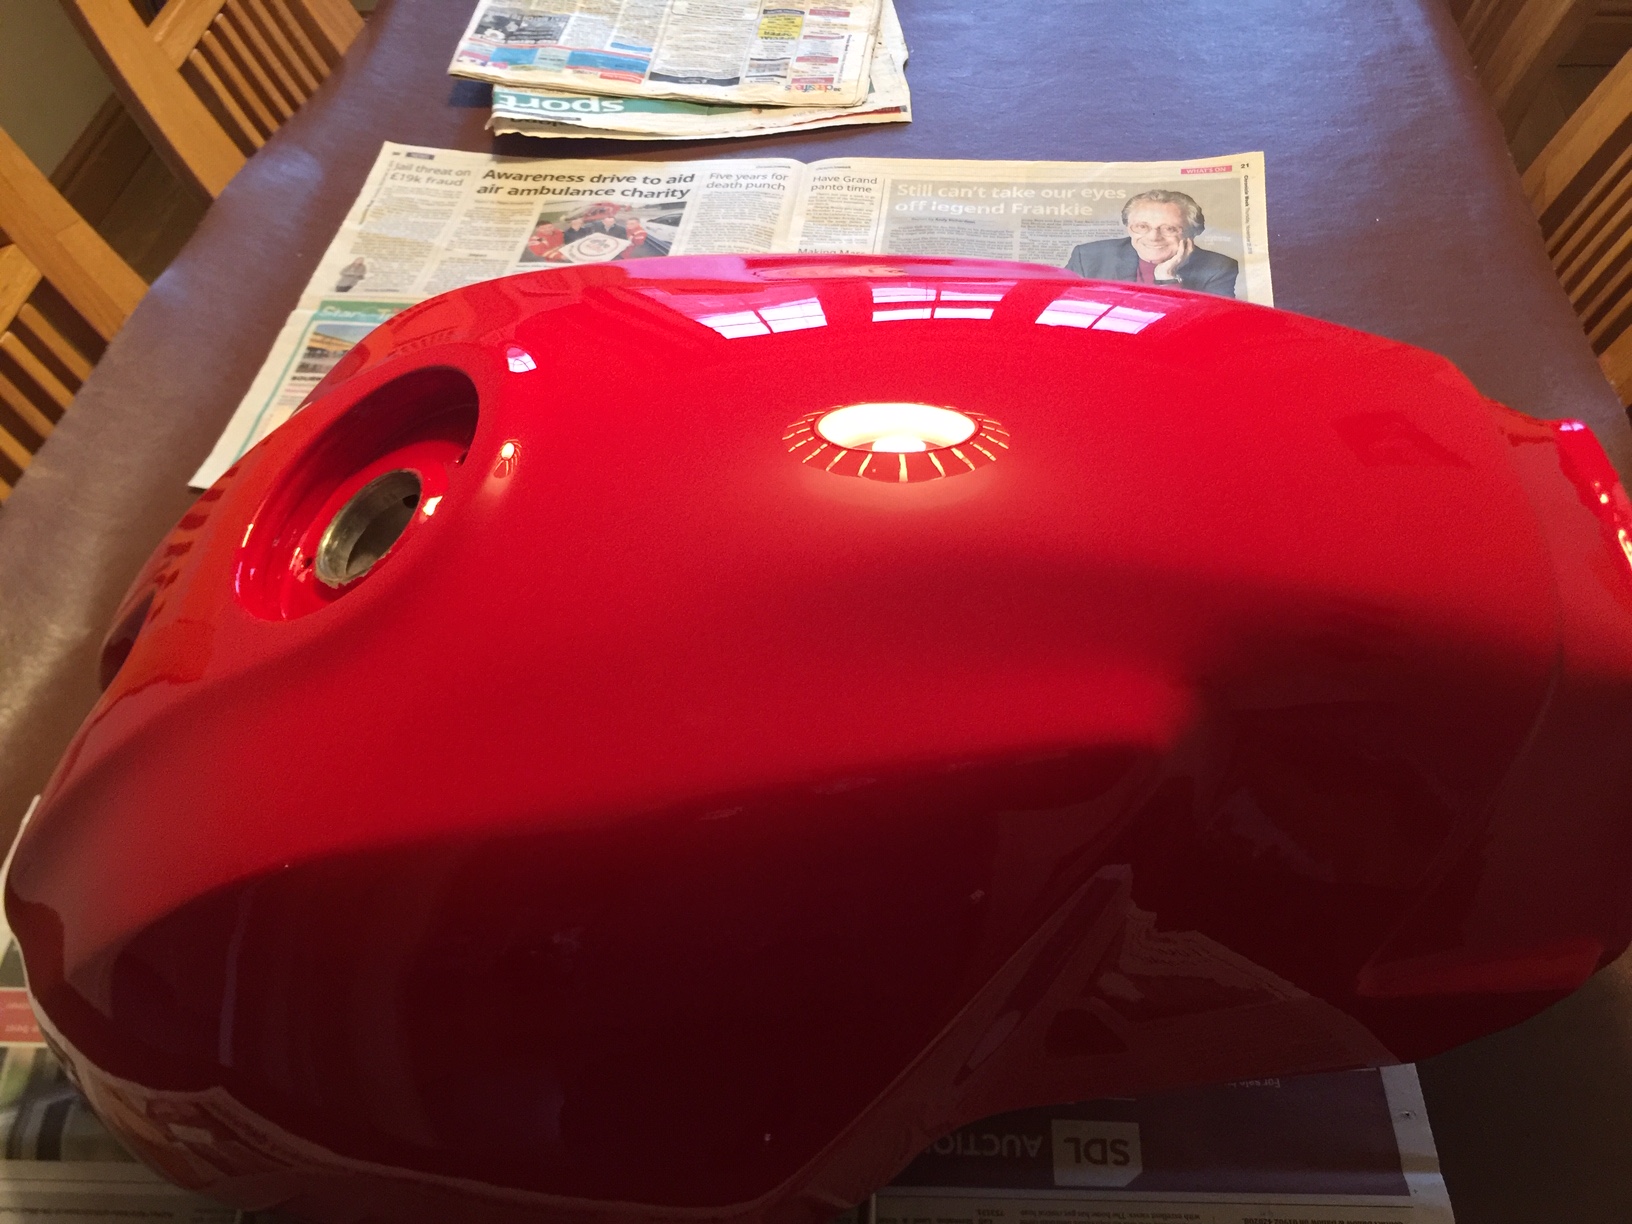
Finally its painting… I am lucky in that I have a garage with an extractor fan, and an air fed mask… so I can use 2k which is wonderful paint and with a lacquer finish, you get a great finish straight from the gun. However, my mate archives AMAZING results from rattle cans! Remember you can now get 2k lacquer in aerosol cans as well now which is great stuff. here is the finish I get straight from the spray gun…

Any questions feel free to contact me!
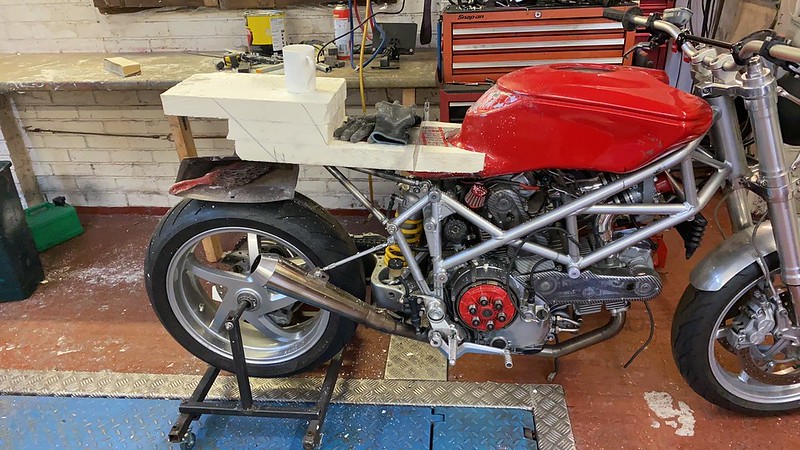
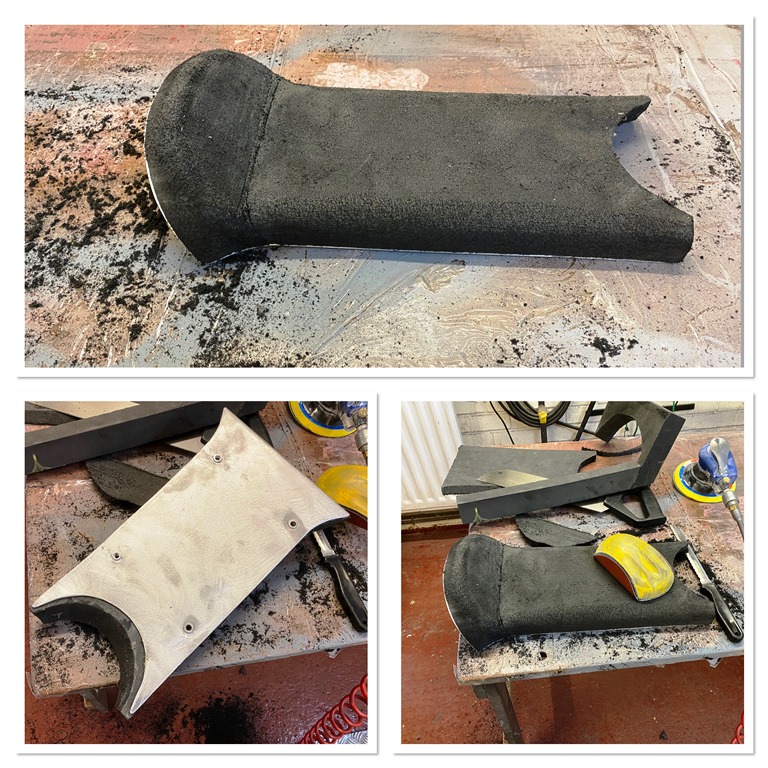
For this one I tried for a while to make a seat out of alloy sheet, and failed. the shape is just to complicated! in the end I decided on an alloy and glass fibre approach. I lifted the tank slightly so the finished seat will have some clearance, and then covered it with duct tape, followed by some tin foil to act a a release. This actually worked quite well! Cutting the foam to shape took a while and is a dusty job, but with the fan blowing on me and out the door it wasn’t too bad. The key to using resin is the mix ratio… I used 2.5% as it was a cold day, in the summer that would have gone off in 5 mins!

