
Way back in 2012 we wanted to do the coast road in the South of France in a convertible car… The plan was to buy the car, do the trip, and then sell it on. We bought a nice MX5 MK1 that was for sale locally. It was a good little car, but in preparation for a long trip, I did some work on it and that summer we did almost three weeks touring in it around Europe, a fantastic trip!
It’s now July 2022 and we still have the car! We are just back from a 2500 mile around France and Switzerland and that was out 8th European trip! The car has never missed a beat in all those miles around France, Austria, Switzerland, Spain, Monaco, Andorra, Luxemburg, Germany and even down to Spain one year!
Below is the story of the car and out trips to date….
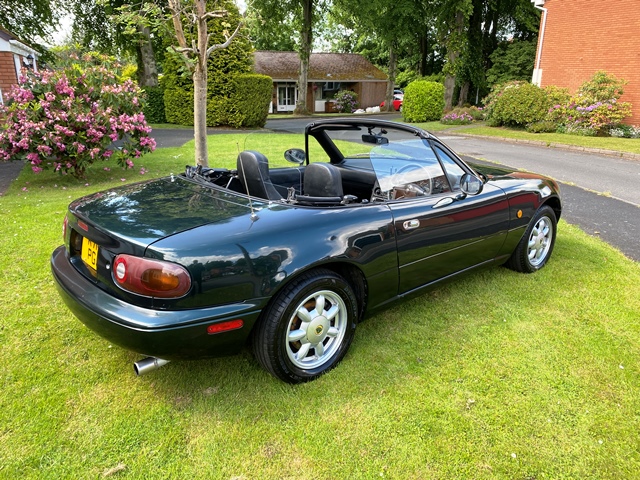
This is how the car started out, pretty good for an older car! Some work to do though as there were a couple of crusty bits on the very lower edge at the rear of the sill. It could have been left (the car had 12 months MoT) but as it appeared to be a good car, I decided to treat it to some new sill sections and some TLC.

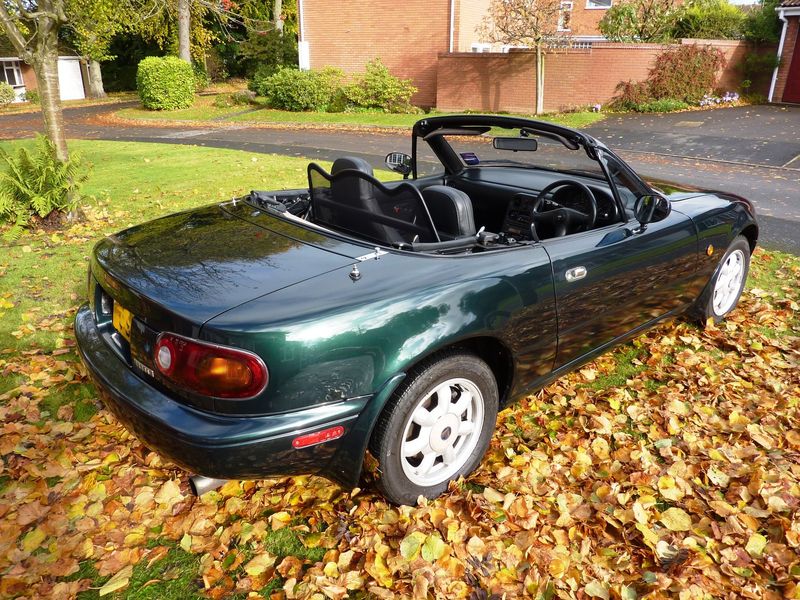
The first job was to sort a small amount of corrosion on the bottom of both sills. As this was the only corrosion on the entire car I decided to tackle it straight away and prevent it getting any worse. It also gave me chance to see what was going on inside the sills!


With the sill removed it was all pretty good in there, so I ordered a couple of sill repair panels. Unfortunately they were very poor quality so I decided to make a couple . Below is the process and final result.
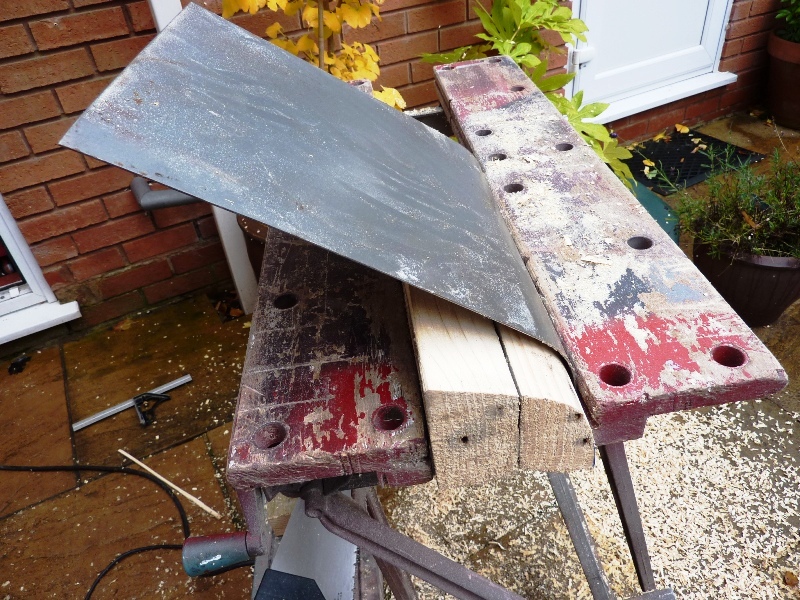


Following a few coats of stone chip to match the original finish, undercoat, base coat and finally a couple of coats of lacquer it looked as good as new!
![]()
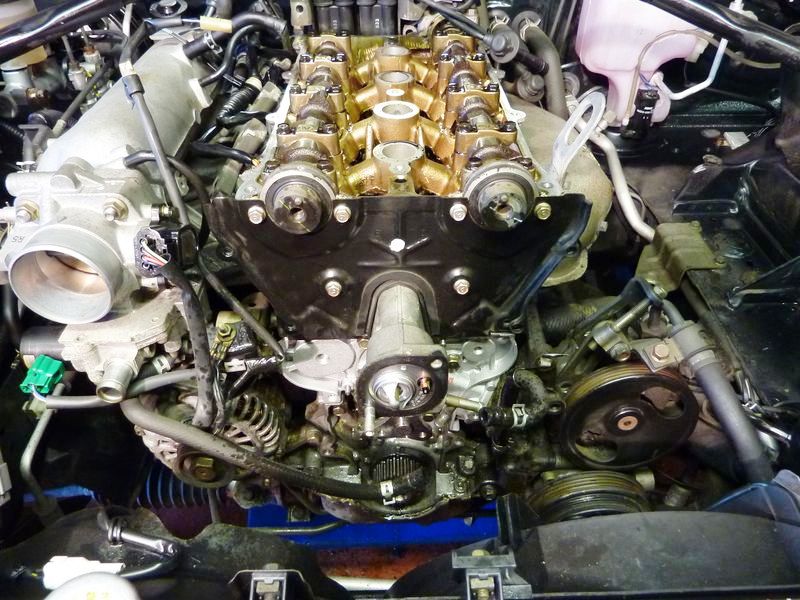
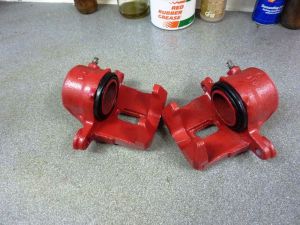
After the bodywork was finished I decided to do some of the mechanical restoration. This included a full brake rebuild, new cam belt and water pump, and all the belts and fluids were also changed. The inside of the engine was like new! The brake callipers were bead blasted and repainted, along with new seals which were very cheap. The Clutch slave cylinder was also changed as this was leaking; a common fault on the MX5.


![]()
The cam belt was an easy task; its easy to get at and its easy to align the cam timing. The only issue is the crankshaft pulley which is held on with a very tight bolt. I had to make a tool to hold the pulley to loosen and retighten the bolt. Its important to torque the pulley bolt up to the right setting as they are prone to coming lose on these cars if not correctly tightened.
As we intended to take the car to the South Of France and Switzerland I also decided to check the clutch… It was actually only part worn, but as it was out, and we intended to do a lot of miles abroad I replaced it anyway.


![]()
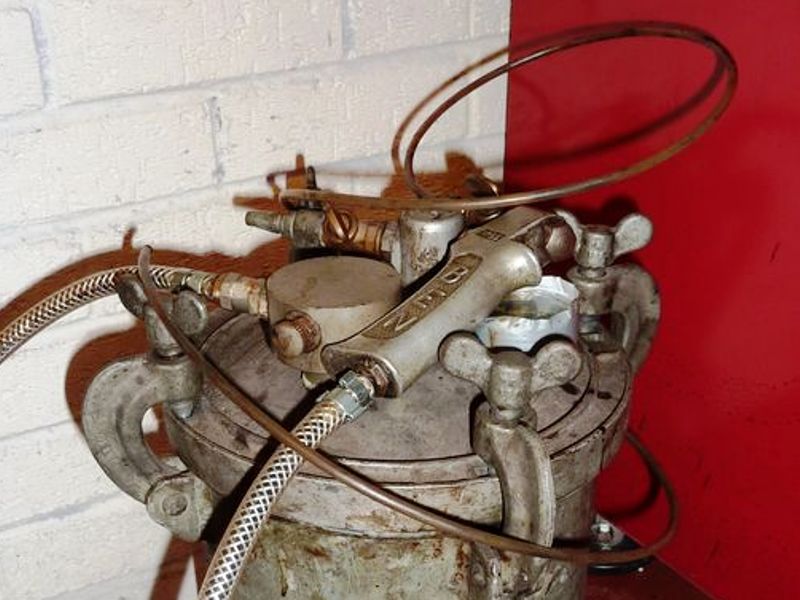
Once all the mechanical work was complete I set about rust proofing the car. As you can see from the pictures above there was no evidence of any protection inside the body cavities. I used waxoyle to coat the entire underside, but importantly also in the cavities. For this I used an old paint pressure pot operating at 150PSI. I made a long spray wand out of a piece of 4mm pneumatic tube and made a small spray head to fit in the end. It took a lot of trial and error to get a good spray pattern. The one picture is of the spray head being made in the lathe. With this I was able to inject wax into all the cavities, through the smallest of holes. This should slow down any future corrosion.


As its an old car, it had practically no security devices on it, so I fitted an alarm and immobilizer, and while I was doing this I also fitted central locking. One of the cheap kits off Ebay actually fitted and worked rather well! The car now locks, puts on the immobilizer and alarm at the click of a button on the remote, something we are all now so used to!


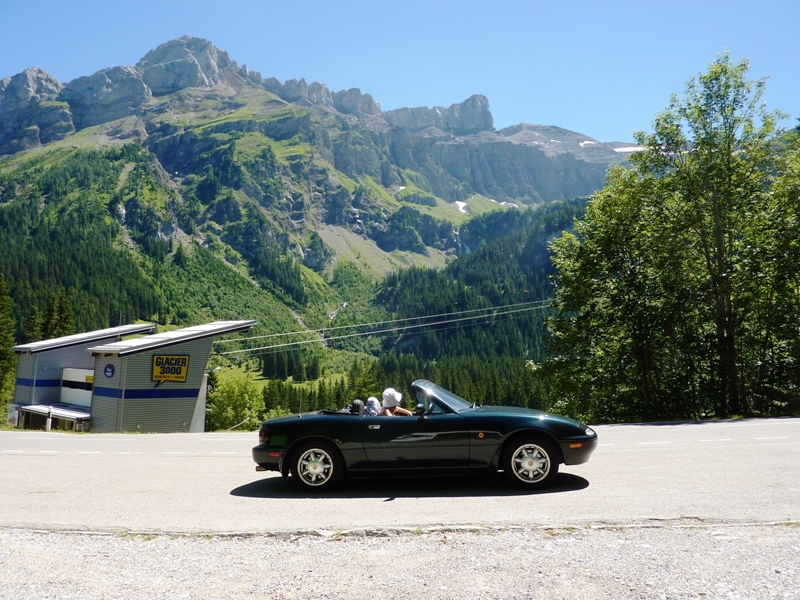
So, a final check on the ramp and off for a trip around Europe! We travelled down through France, into Switzerland, back into France and down to the South coast and Monaco, and back home. we did 2700 mile in two weeks, most of it with the hood down, the car never missed a beat and returned 38MPG over the entire trip.


While we were in France I noticed the air con was not as good as it should be. When we got home I checked it over and found that although it was full of gas, the condenser fins had become come dethatched from the tubes. Time for a replacement.
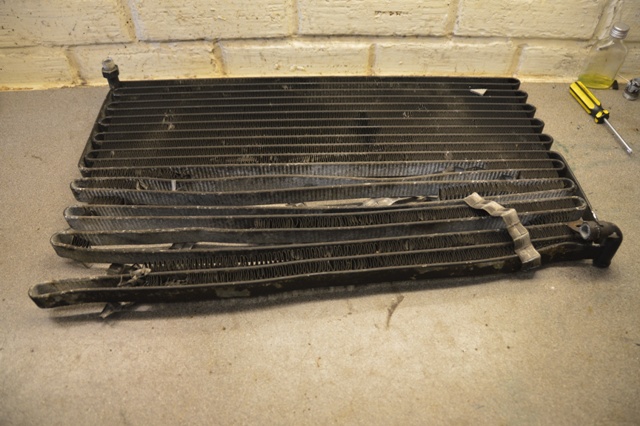
Try as I might I could not source a new condenser, No one stocked this particular type for the Mx5 or Eunos and I really did not want to replace it with a second hand one as it was as likely to be as bad. Looking at the catalogues for condensers I found that a Rover 25 one was roughly the same size so I bought one of these and set about modifying it to fit.


First job was to make a frame so I could mount the condenser onto its original mountings on the car, and then mount the dryer onto the frame.

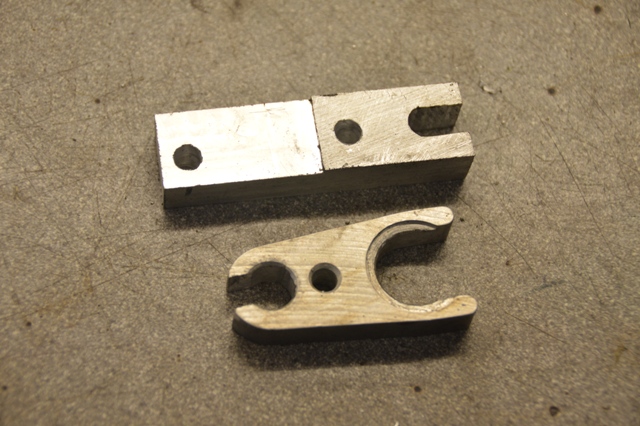
The hardest part was making new pipes and connections as these are high pressure. unfortunately the MX5 pipe ends are a different type, size and shape to the Rover ones so I had to make some new pipes, and modify the mounting method. a couple of hours on the milling machine soon had some new clamps made. The clips are a very neat alternative to swaged ends!


Here it is in place, hopefully it should last a few more years!
![]()
Also in anticipation of this years trip down to Spain, I have fitted a cruise control.

This was fairly easy to fit, the biggest problem was actually getting it to work! at first I could not get it to activate and tried all sorts… In the end it turned out to be the fact that I had previously fitted LED stop and tail bulbs, and the current draw on these was not enough for the Cruise ECU to pick up on! That had me scratching my head!

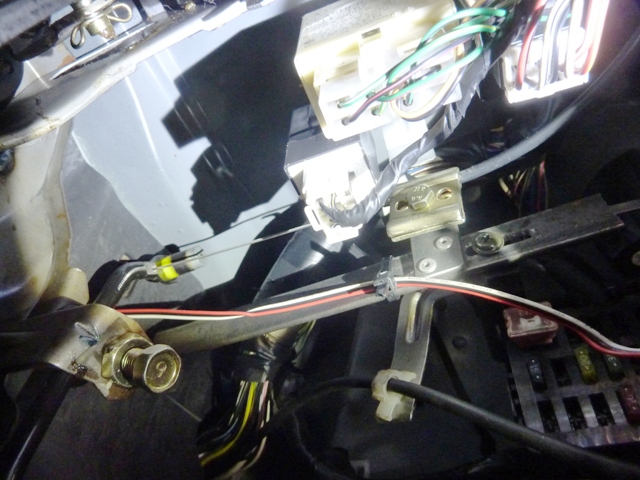
I fitted the throttle servo under the bonnet and fed the cable through the bulkhead and connected it to the throttle pedal. While I was under there I also fitted the clutch reed switch (so the cruise disengages if you depress the clutch) and linked into the stop light circuit.
The Cruise monitors the speed of the car via a sensor that picks up on a small magnet which I have attached to the prop shaft. It actually works really well and holds the speed perfectly at what ever its set at. Should be a boon on the longer stretches of the trip, and it will of course help improve the MPG!
![]()
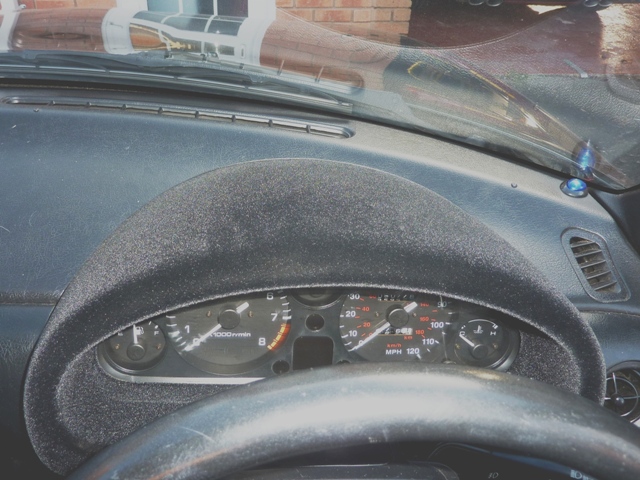
One of the design faults of the MK1 and 2 MX5 is the reflection the instrument cowl makes in the windscreen. If its sunny, it can be quite bad and distracting. I tried coating the cowl with matt black paint but this had a limited effect and still left a noticeable reflection.
I then had the cowl flocked in black fibres. this was done by a local company who also do flocking work for Bentley and Aston martin and their work is first class. The result – no reflection at all in the windscreen!

![]()
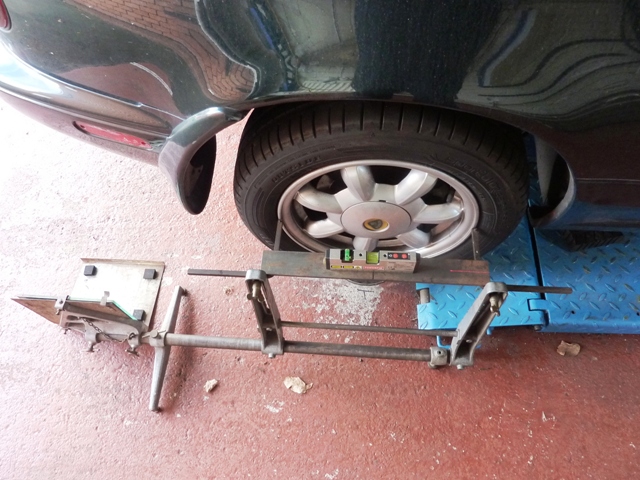
I have had some Dunlop tracking gauges for many years, these are still accurate bits of kit for setting the tracking on the car and have the advantage they are easy to accurately calibrate.
One of the things I have never been able to do though is set the rear track… By using the gauges on the rear wheels (you have to reverse the readings) it’s possible to get an accurate Toe in or out reading, but you never know if the wheels are aligned to the fronts… It’s possible that if you say have 4 mm “toe in” on the rear, it could be all on one wheel. I have tried the string method to measure this but with limited success.
A few weeks ago I hit on the idea of using a couple of laser levels in combination with the tracking gauges… by carefully mounting them on the top of the track gauges, and then calibrating them so they shone the beams parallel, I was able to accurately set the rear track in relation to the front. Due to the length of the beam, the slightest variant on the rear shows up 20 fold on the measure…
While I was on, I made a camber gauge out of one of the cheap digital angle gauges. These measure to a 0.1 of a degree, which I feel is accurate enough, given to tolerance most manufactures give for the settings.
Of course any suspension measurements are only as accurate as the garage floor is flat. To ensure I had a flat datum to work off, I used a simple water gauge made up of a bucket of water and some thin plastic tube. I coloured the water in the bucket with some coffee first so it showed up easily in the tube. By placing the bucket of water in the middle of the garage, and then running the tube to where the wheels sat on the car, I was able to very accurately level the adjustable turn plates I had made to ensure the car was completely flat. My garage was out 5mm side to side, but 40mm front to back.
The turn plates are made of 10mm steel plate with adjustable feet, between the plates is a smear of grease, this means that any adjustment made to the suspension easily settles, rather than keep rolling the car back and forth.
The two lines on the floor are to enable the wheels to be accurately turned 20 degrees in both directions to check the castor setting.
So far I have checked my SLK 55 AMG which was almost bang on to the middle of the settings given by the manufacturer. My MX5 however was MILES out! The camber and castor on the front was OK, as was the track (I had previously set this…) but the rear camber readings were 1.8 degrees on the NS, and 0.5 on the OS! The track was also out, but more importantly the wheels were massively misaligned to the fronts. It took me ages to get it right as each time you adjust the camber, the track goes out! I am amazed though how different to car feels on the road, it handles so much better!


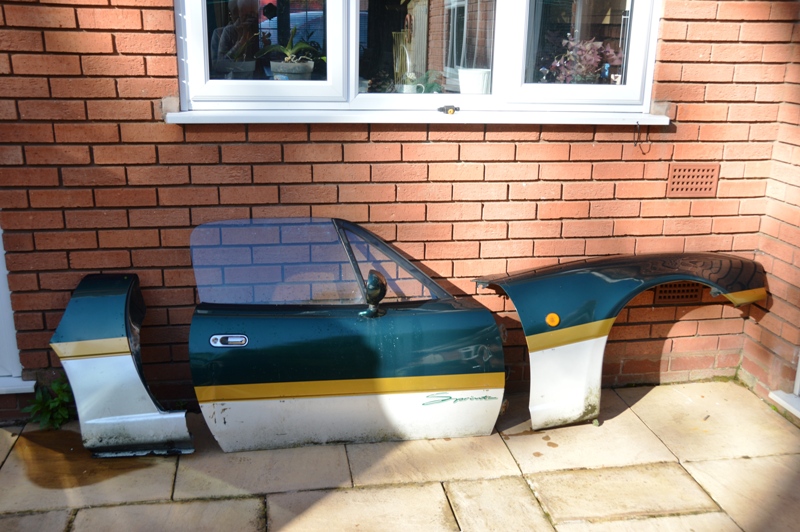
May 2014 disaster struck and a 17 year old lad pulled out and hit the side of me which has written the car off in the eyes of the insurance. I bought the car back though and set about repairing it as there was no structural damage at all as you can see from the picture below.

First job was to strip off all the damaged door and wing. Fortunately no structural damage underneath, just the top door hinge mounting distorted slightly…. I had to cut the door open though to get the electric window winder mechanism out!


In the mean time I managed to source some rust free panels off another car in the local breakers yard. This was also an immaculate car that had been hit on the other side, so I was pleased to get some almost perfect panels. The door did have a slight dent, but I preferred that to a rusty one! I cut out the damaged area of the rear wing, keeping the panel size to a minimum. The new section was then continuously welded into place, and then lead loaded… I have not done that for years!


The top door hinge mounting was slightly distorted so I welded a bar onto the old hinge mounting plate and used that to pull it back into position. After trial fitting the door and front wing, everything lined up as it should do and all the panel gaps are what they were pre accident.


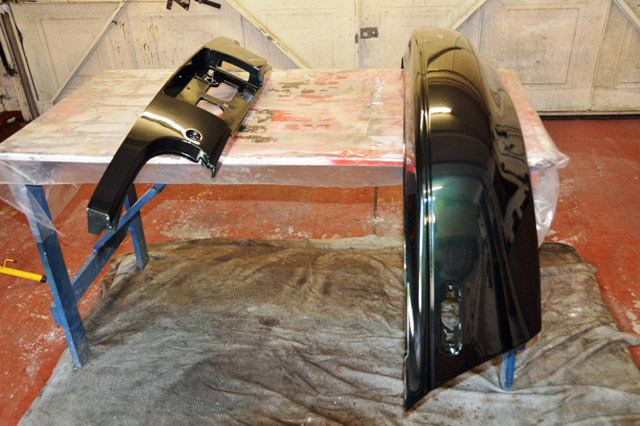
All of the paintwork is now complete, and reassembly has started. I have also taken the opportunity to paint the front bumper as it was a slightly different colour. Below is the car finished and back on the road. Its as good, if not better than pre accident as the paintwork is better and the bumper miss match on the paint is no longer there.

![]()
We enjoyed the trip to the south of France and Switzerland in 2013 so much that in 2014 we planned another, taking the car down through France, into Andorra, and then on into Spain. With the car getting damaged we thought at first that we would not be able to go, but it was soon repaired and back as good as new! With day trips out we did 3000 mile in all and again the car performed faultlessly! we have also since done a tour of Wales and Devon!


![]()
April 2015 disaster strikes again! some guy runs into the back of me…. Minimal damage but the insurance deemed it a total loss again! No structural damage, just a slightly bent rear inner panel which straightened easily. I guess this gave me the excuse to paint the bumper as there were a few scuffs on it. The insurance have categorised it as a CAT D, which I guess makes its value even less now, but I hope to continue to enjoy the car and we are planning another trip to France in August.


![]()
August 2015.
We planned another trip to France, this time with friends in their MK1 MX5. The trip didn’t start well as the day before we were about to leave I heard a noise on the car… It turned out to be a squealing bearing on the water pump which was only a few years old! This meant a hasty strip down of the engine to replace the pump, which also showed some signs of leaking… I replaced the belt and tensioners at the same time as it was all apart.
A short trip this time as we only had a week, we visited Rouen, Laval, and Honfleur which is a lovely town on the Normandy coast. An entire week with the roof off the car!


I noticed a few drips of oil on the drive… this was down to the front crank oil seal leaking. Not a bad job, the seal comes out easily with a screwdriver, being careful not to scratch the crank… Installation is a little more difficult, so I made up this seal installer out of some alloy tube. with this it went in easily.

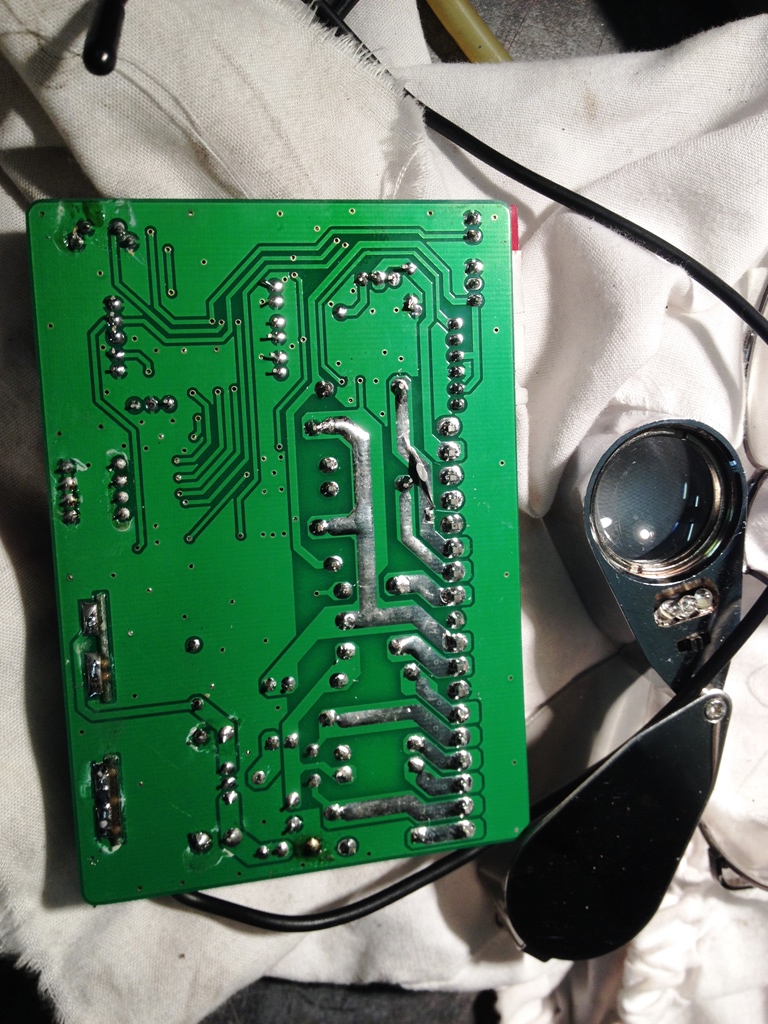
Another fault that needed attention was the central locking stopped working. After taking the alarm/locking module apart I noticed a dry joint on the circuit board… by just touching the connections with a soldering iron re-established the joint and it worked again! I have cured many electronic faults on cars and electrical items with this… the trick is to use a magnifying glass to check the joints as they are not obviously faulty to the naked eye.

July 2018 and the car is going well… we decide to do another Europe trip and in anticipation of this the car gets a big service… new pads all round, oil and filter, gearbox oil, and antifreeze and a plug change. then its off! we drove down through France, into the Germany and the Black Forrest, into Switzerland and back into France, around 2000 mile and it never missed a beat!


April 2012 and in the grip of the corvid 19 virus and self isolating… took the opportunity to replace the hood which I have had in stock for 5 years!
changed the O2 sensor today… I was dreading doing it as its been in there for 25 years! I sprayed it every day for a week and it actually came out easy with the right tool! helps having a hoist in my garage! Fitting the new one, I used some ceramic grease.. this is sold by Mercedes for installing injectors which have a real problem with seizing… I have used this on exhaust huts and it seems to last years!


June 22 and its time for a BIG service in anticipation of a trip to France and Switzerland… So its a brake change, cambelt, air con re gas, and a good clean!


June 2022 and we are just back from a 2500 mile trip to France and Switzerland! The car never missed a beat.


June 2023… doing a bit of routine maintenance and I notice that there is the odd bubble in the radiator… always a bad sign! I took it over the to a mate who has a head gasket sniffer and sure enough the liquid he uses changed from blue to green, indicating a slight leak. I had been smelling antifreeze for a while but had lost no water so I suspected the water pump was leaking slightly as well… so off came the head!
Sure enough there were early signs of gasket failure, always better to catch it at this stage. So new gasket, cam belt, water pump, cam and crank seals, and also a full set of coolant hoses as the old ones were 30 years old!


September 2023… it a very hard decision but we have decided to sell the car. We have had some fantastic holidays in it all around Europe and in the UK… But its time to move on so the car is now up for sale, I hope it goes to a good home!

Great work.
great job you have done on your car, looks really fantastic.
Very impressive work and a really well put together article and photos.
Great work. If you ever want to work your magic on my car, let me know 🙂
A great read, thank you. Would appreciate your input for mine! http://riona6ce.wordpress.com/
came across your blog looking to do work on one I’ve picked up, wish I only had the time and patience AND expertise to follow in your footsteps, great job!
What an enjoyable read, thank you so much for sharing.
Fantastic effort and just shows you how much talent is out there. Well done and wish I didn’t have two left hands!